Gilson SSS Dash Fitting method

Paint, body preparation and modification, interior work and electrical
User avatar
Insitu_az
Posts: 12
Joined: 26 Mar 2021 21:49
Location: Mesa, Arizona

Gilson SSS Dash Fitting method

Post by Insitu_az »

I have been working on fitting my Gilson SSS dash, and thought I would pass along a couple ideas on how to get it done pretty easily.

As with any after market part, there are going to be some basic fitment issues. So has been my experience with the SSS dash. Starting with the new center console, there is a bit of difference in the width of the panel. I am using the 3 gauge panel with 1 din radio (so may not apply to the 2 din panel). My new panel measured about 3/16 inch (about 4.75 mm) wider than the stock panel. If you are installing just the center panel, it will fit without any issues. The gaps between the dash and glove box will be 3/32 inch narrower, nothing more.

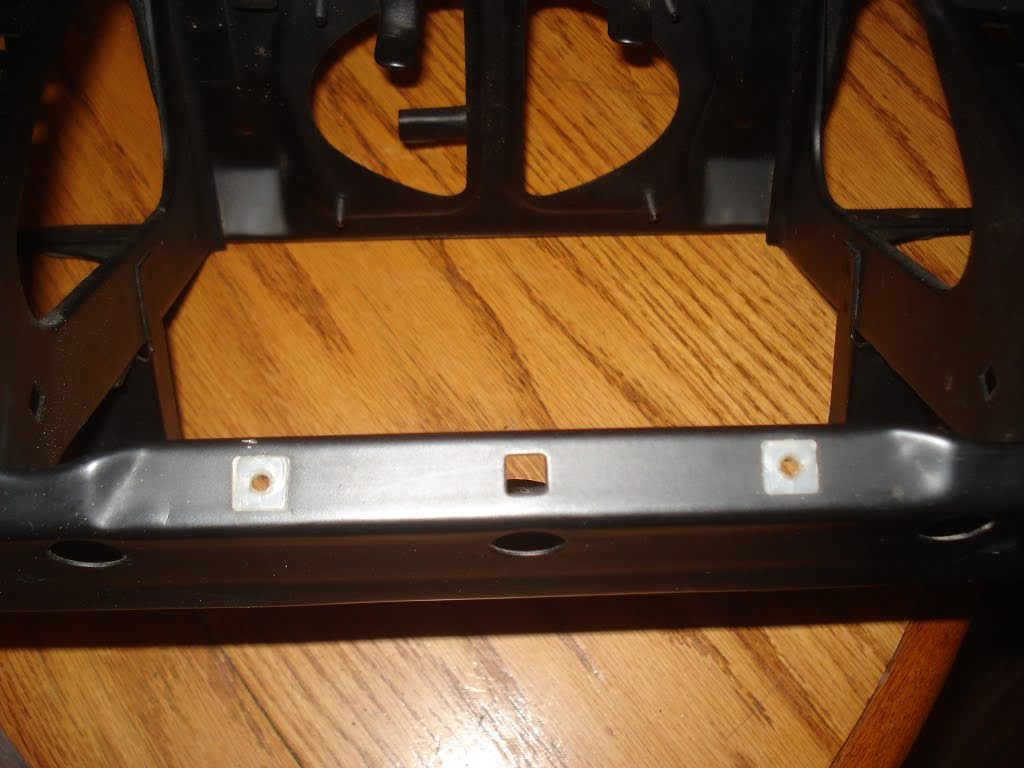
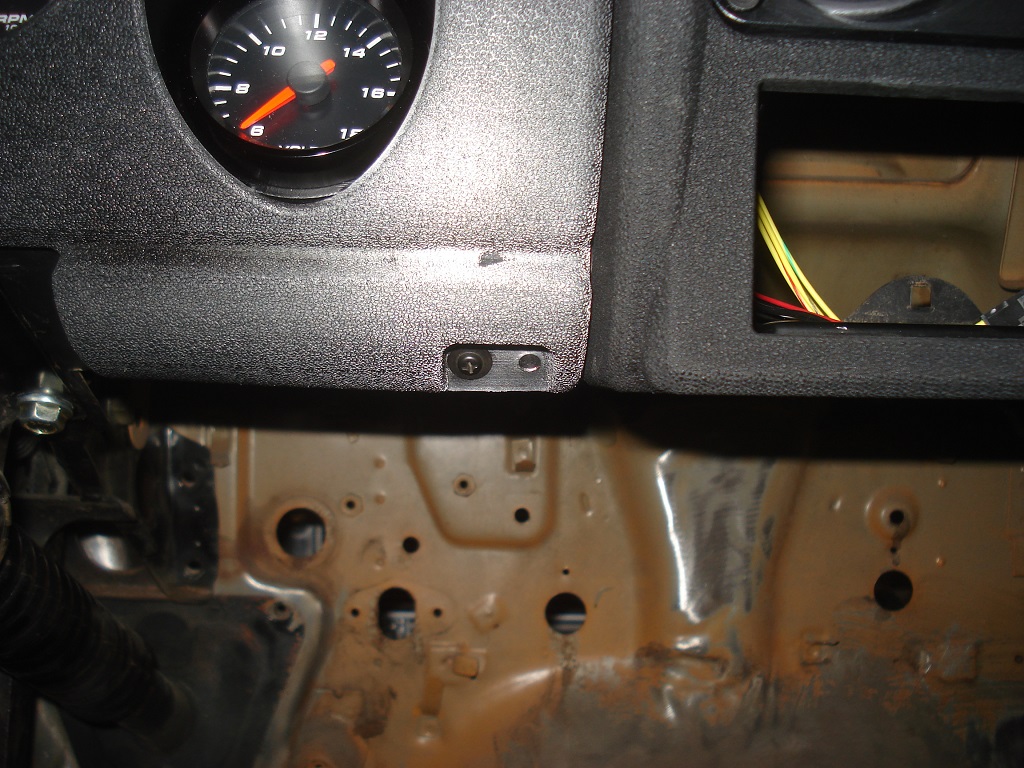
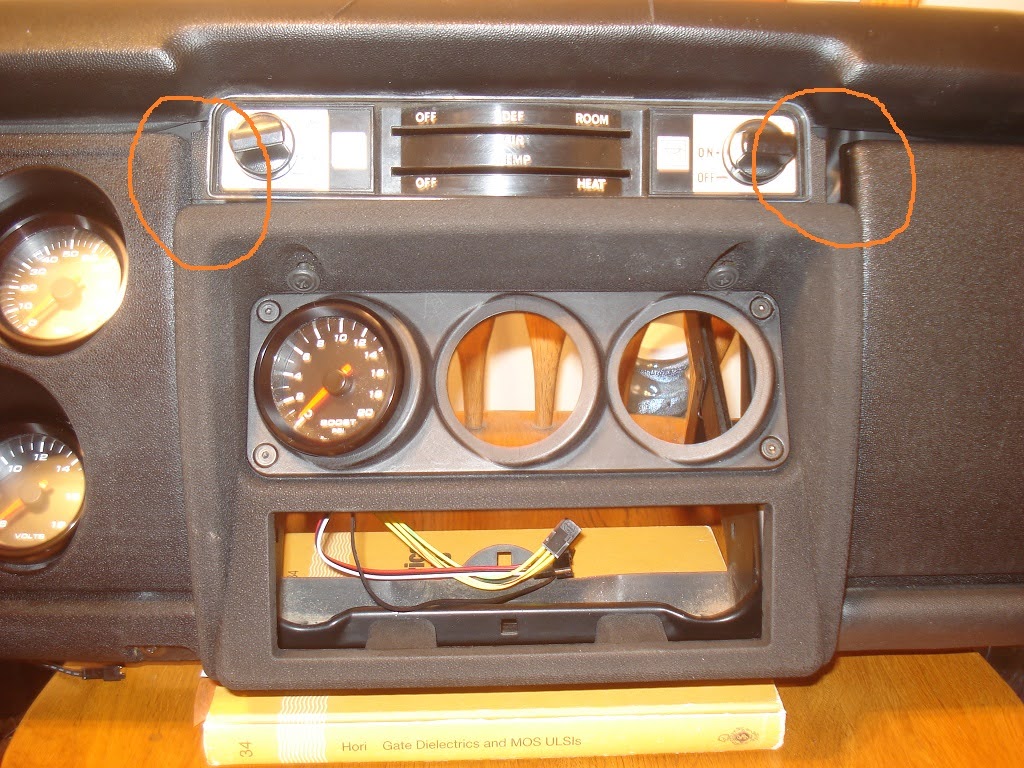
The SSS dash panel has some other issues. The panel is almost 1/4" wider and the attachment holes at the bottom right are displaced to the right a little over 1/8". These differences place most of the screw mounting holes out of line with the plastic mounting tabs in the dash frame. The mounting holes on the left side of the panel are a bit lower than the stock pael, and those two screws also will also not line up. Because of the location of the headlight and wiper switches, the SSS dash panel mut be pushed to the right to make up for that 1/4" difference in width.

Anyways here is how mine is coming out, next post I will cover how I made the panel attachment adjustable so that it will all fit.

Image
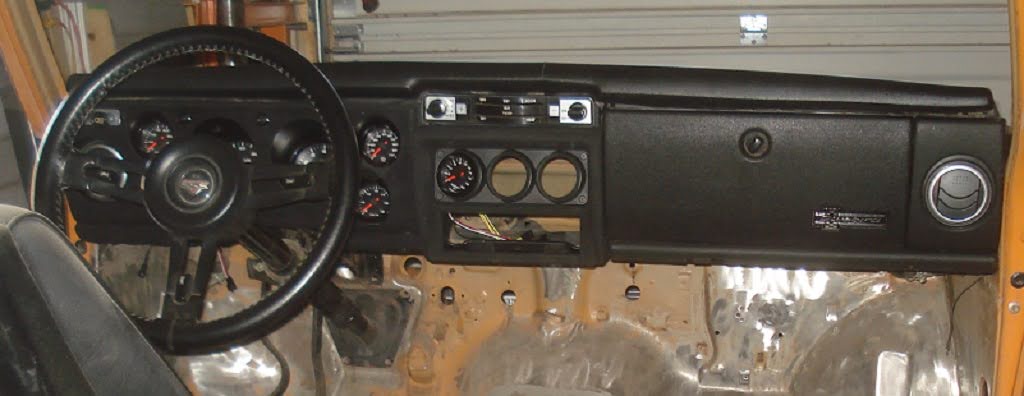
View from the passenger seat on my project car.... ignore the construction debris. lol

Image
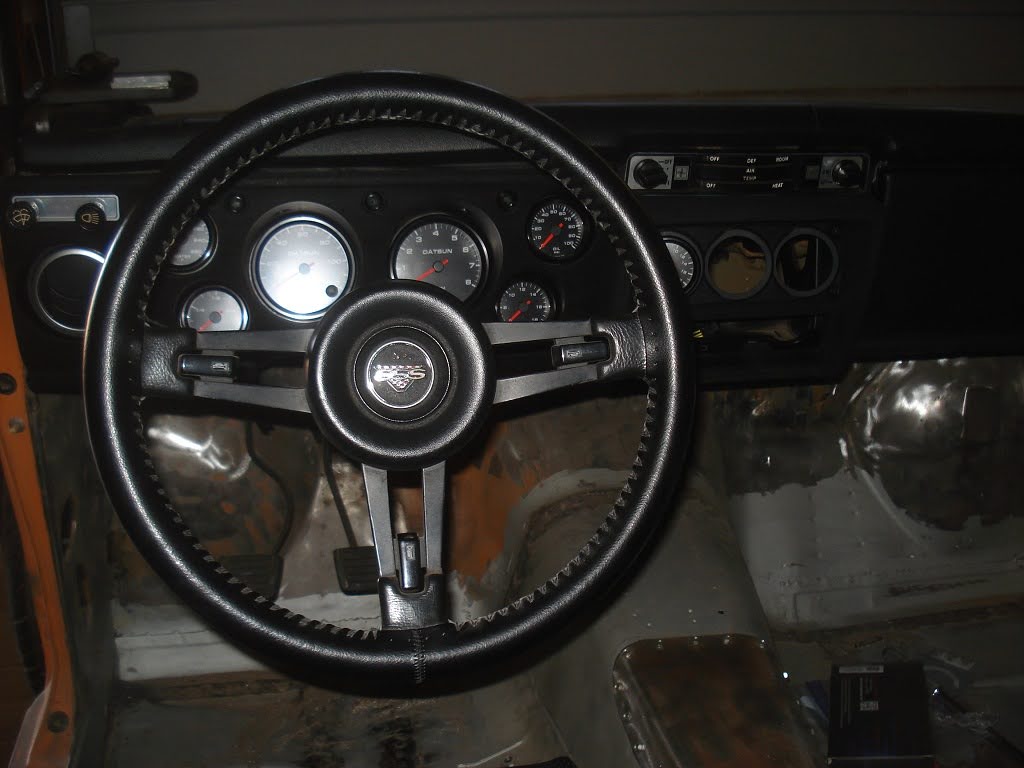
View from the driver's seat. Wideband and a clock will fill those two empty holes.

To be continued.....
See what's happening in Arizona... WWW.Desertdatsuns.net
User avatar
Insitu_az
Posts: 12
Joined: 26 Mar 2021 21:49
Location: Mesa, Arizona

Gilson SSS Dash Fitting method - part 2

Post by Insitu_az »

The modifications I did can probably be done with the dash in the car. My car is still a "project", so I am showing pictures with the dash removed from the car.

First remove the stock dash, center panel and glove box. On the metal dash frame you will find small plastic anchors for the dash mounting screws. The objective of this stage is to make the dash panels adjustable from side to side.

The SSS dash panel must be mounted first. It must line up with the headlight and wiper switches.

Image
Here are a couple of the plastic mounting tabs. These are the ones located at the bottom of the center panel.

From the rear of the metal dash frame, you can squeeze the "arms" of the little plastic mounting tabs together, give them a push, and they will pop out of the hole. The hole is about 8mm square as you can see on the hole in the center of the above picture. Take care pushing these out, as they are old and you will likely break a couple of them. There are five extra ones on the panel that were originally used to hold the instrument cluster and ash tray, but only five. Take care....

Next step is to make the holes wider so that the mounting tabs can be moved left or right for adjustment. I used a small hand nibbler for this job. Search amazon for "nibbling tool", they cost less than $15.

Image


Here is a mounting hole that I have made wider. As you fit the panels you will find that most of the holes only need to be extended on the right side, as the instrument panel has a fixed location on the left side of the car due to the location of the headlight switch and wiper switch.

Image
I have widened this hole by about 3/16 inch with the nibbler.

After you have made the holes wider, clean them up with a small file and re-insert the little plastic mounting tabs. They now can be slid into position so that they line up with the dash mounting holes.

To be continued in part 3 of this saga. :D
Last edited by Insitu_az on 07 Jun 2021 14:03, edited 4 times in total.
See what's happening in Arizona... WWW.Desertdatsuns.net
User avatar
Insitu_az
Posts: 12
Joined: 26 Mar 2021 21:49
Location: Mesa, Arizona

Gilson SSS Dash Fitting method part 3

Post by Insitu_az »

Attaching the SSS dash panel.

Before the panel is attached you need to move two more plastic tabs located on the left side of the dash frame facing the door. The mounting holes in the SSS dash are a bit further back than the tabs.

Image
Ignore the condition of this dash frame. Its an old one from my shed. Circled tabs are the ones to move.

Next issue is the recessed area on the lower right of the panel. The original panel has a slight raised tab on the back side which is missing on the SSS panel. If you tighten the screw without this tab it puts some stress on the corner which could possibly lead to a fracture. I made a small spacer that mounts behind this tab to raise it to the stock height and also space the screw away from the side of the recess.

Image
Mounting screw recess with spacer installed.

Image
This is the spacer. The two raised pegs snap into the panel holes and relocate the screw to the right a bit.

The final thing to fix are the tabs that hold the panel on the top. The screw holes are located in the tach and speedometer recesses. The tabs need to be bent to line up with these holes.

With those items taken care of, go ahead and install your headlight and wiper switches and mount the dash panel to the frame. Slide the plastic tabs around to line the panel up and install the screws. Center panel is next...
See what's happening in Arizona... WWW.Desertdatsuns.net
User avatar
Insitu_az
Posts: 12
Joined: 26 Mar 2021 21:49
Location: Mesa, Arizona

Gilson SSS Dash Fitting method part 4

Post by Insitu_az »

Mounting the center panel.

The center panel goes on pretty easily. The holes at the top of the panel can be utilized without modification. The plastic tabs at the bottom need to be moved to the right to fit the center panel snug against the dash. You will want to fit the air vent and fan control panel at this time also if you previously removed it. Note that the air vent/fan control panel must remain centered to match up to the recess in the dash pad.

The gap on the right side of the air vent/fan control panel will be larger than the gap on left side since it remains centered.

Image
Gaps circled.

Just about done. Glove box is next...
See what's happening in Arizona... WWW.Desertdatsuns.net
User avatar
Insitu_az
Posts: 12
Joined: 26 Mar 2021 21:49
Location: Mesa, Arizona

Gilson SSS Dash Fitting method part 5

Post by Insitu_az »

Fitting the glove box.

The glove box will need to be shifted to the right, but keep it as snug against the center console as possible. You must fully open the door before the glove box can be removed or installed. There are six screws inside the glove box as well as the two at the bottom. I installed a 1/8" thick spacer between the right side of the dash frame and the glove box panel to keep it all lined up.

Image


Image


Image
Spacer for glove box.

If you want to try this and need a copy of the printer files for the two spacers, just shoot me a PM.
-Guy
See what's happening in Arizona... WWW.Desertdatsuns.net
User avatar
abisel
Posts: 231
Joined: 29 May 2014 14:30
Location: St. Charles, Missouri

Re: Gilson SSS Dash Fitting method

Post by abisel »

I too are working on a Gilson SSS dash for the '71.

IMG_20210521_210449698-1.jpg
IMG_20210521_210449698-1.jpg (437.27 KiB) Viewed 2816 times
_20181006_141359-1.jpg
_20181006_141359-1.jpg (530.79 KiB) Viewed 2816 times
loungin112
Posts: 347
Joined: 05 Mar 2014 21:34
Location: Colorado

Re: Gilson SSS Dash Fitting method

Post by loungin112 »

abisel wrote: 22 May 2021 05:09
_20181006_141359-1.jpg
Twins?!?
Attachments
IMG_20131026_083007.3.jpg
IMG_20131026_083007.3.jpg (322.65 KiB) Viewed 2787 times
User avatar
ostaylor
Supporter
Posts: 415
Joined: 19 Dec 2020 08:40
Location: Victoria, BC

Re: Gilson SSS Dash Fitting method

Post by ostaylor »

Thanks so much for posting the details of your fitment of the SSS dash and 3 gauge single DIN center piece. I have purchased the same pieces from Gilson and will definitely refer to this post when it comes time to do my installation. I will PM you for the 3D printer files for the additional pieces.
Regards,
Owen
70 Datsun 510 2 door - SR20DET - https://www.the510realm.com/viewtopic.php?t=34572
64 Studebaker Daytona - Supercharged 289 4 speed
65 Sunbeam Tiger MkI
User avatar
SupDoc
Posts: 8
Joined: 07 Mar 2013 19:08
Location: Rio Vista, CA

Re: Gilson SSS Dash Fitting method

Post by SupDoc »

@Insitu_az Where did you find that tachometer with "DATSUN" printed on the face? Is that OEM or aftermarket?
User avatar
cartel
Posts: 493
Joined: 24 Sep 2015 23:32
Location: Langley

Re: Gilson SSS Dash Fitting method

Post by cartel »

pretty sure those are speedhuts- you can load any logo you want in $20 per guage-

ive used them in 5 cars so far-- work well and GPS speedo saves a lot of headache on swaps- plus fuel guage is for any sender type
Mike Gibson
Datsun: 71 dime; 73 Z ; GT3 240
Other: 65 + 67 Mustang ; 03 murcie
User avatar
MikeY
Posts: 695
Joined: 26 Jun 2003 16:25
Location: Qualicum Van Isle

Re: Gilson SSS Dash Fitting method

Post by MikeY »

Ran across this speedo delete plug. I assume it would come in handy if your putting a GPS unit in one of these dashes.
https://datnissparts.com/rwd-speedomete ... 996-c3040/
User avatar
Insitu_az
Posts: 12
Joined: 26 Mar 2021 21:49
Location: Mesa, Arizona

Re: Gilson SSS Dash Fitting method

Post by Insitu_az »

Mike had it right. They are Speedhut gauges.
- Guy
See what's happening in Arizona... WWW.Desertdatsuns.net
User avatar
ostaylor
Supporter
Posts: 415
Joined: 19 Dec 2020 08:40
Location: Victoria, BC

Re: Gilson SSS Dash Fitting method

Post by ostaylor »

The Speedhut gauges also fit the Gilson SSS dash without modification. My Autometer speedometer and Tach required modification to fit (grinding down the bezel). This doesn't negatively affect the operation or the look once installed, but obviously makes the gauges pretty worthless if ever removed from the Gilson dash.

My other (smaller) Autometer gauges fit both the SSS Dash and the single DIN 3 gauge cluster without issue.
Last edited by ostaylor on 24 Jan 2022 16:41, edited 1 time in total.
Regards,
Owen
70 Datsun 510 2 door - SR20DET - https://www.the510realm.com/viewtopic.php?t=34572
64 Studebaker Daytona - Supercharged 289 4 speed
65 Sunbeam Tiger MkI
User avatar
abisel
Posts: 231
Joined: 29 May 2014 14:30
Location: St. Charles, Missouri

Re: Gilson SSS Dash Fitting method

Post by abisel »

I'm still working on the Gilson SSS instrument panel. VDO gauges and getting all the wiring in order. More wiring needed and then connect to the car's wiring by using the stock connector. Maybe some bullet contacts will fit the stock 12-pin receptacle.
top center is a warning light/buzzer for programmable red-line on the tach.  Bottom center is switch to select tach or speedo and two pushbuttons for programming the tach and speedo functions.  Still need to add 3 warning lights for oil pressure, alternator charge, and handbrake.
top center is a warning light/buzzer for programmable red-line on the tach. Bottom center is switch to select tach or speedo and two pushbuttons for programming the tach and speedo functions. Still need to add 3 warning lights for oil pressure, alternator charge, and handbrake.
IMG_20220124_083007314.jpg (410.67 KiB) Viewed 1965 times
bunch of wires and splice connectors.  Still need to add more wiring.
bunch of wires and splice connectors. Still need to add more wiring.
IMG_20220124_083552662.jpg (434.49 KiB) Viewed 1965 times
Last edited by abisel on 24 Jan 2022 08:00, edited 1 time in total.
User avatar
abisel
Posts: 231
Joined: 29 May 2014 14:30
Location: St. Charles, Missouri

Re: Gilson SSS Dash Fitting method

Post by abisel »

this is the wiring diagram I am working with.
Attachments
SSS wiring conversion.jpg
SSS wiring conversion.jpg (303.76 KiB) Viewed 1960 times
Post Reply