How-To: Door Panels

Paint, body preparation and modification, interior work and electrical
Post Reply
User avatar
Rush
Supporter
Posts: 636
Joined: 23 Jun 2014 07:21
Location: Northern WI, From Simi Valley, CA

How-To: Door Panels

Post by Rush »

I posted about these in my build thread but I thought it'd be easier to find in its own thread.

How I made my own door cards.

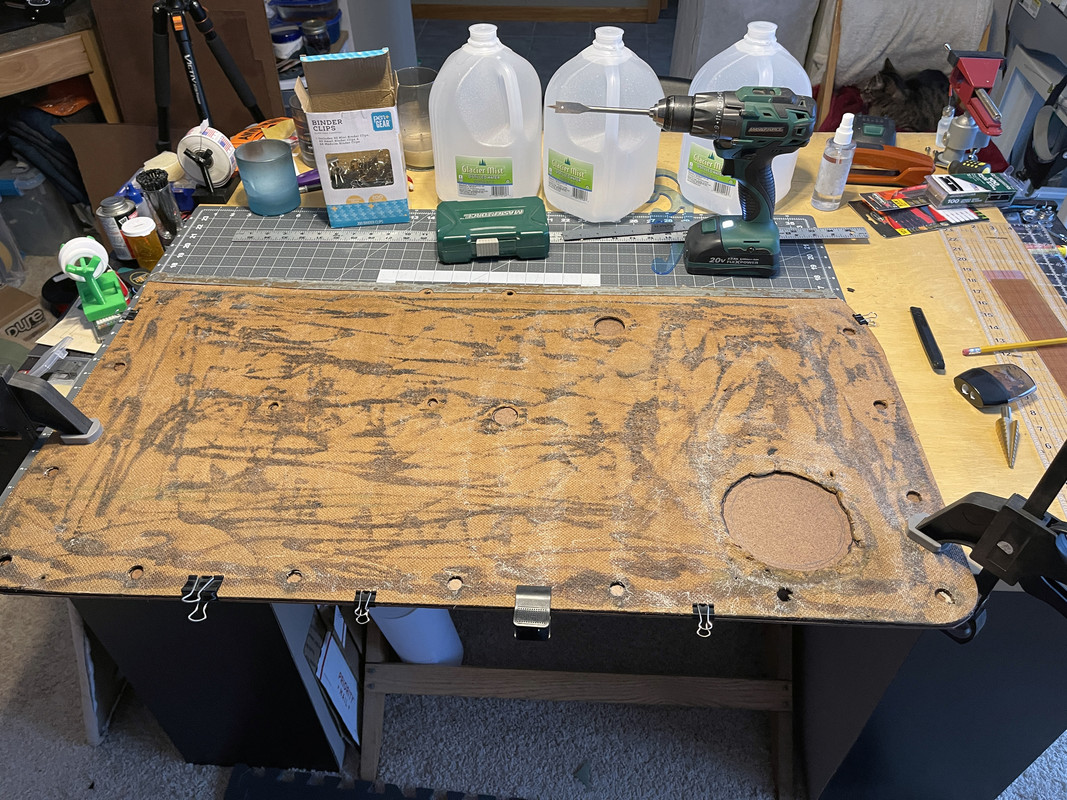
1) First, I traced my original door cards onto 1/4" beaverboard (or sheet ABS, 1/4 plywood, etc). If you haven't got any to trace, it might be worth trying to get your hands on a trashed set because you'll need the top metal strip for the front ones. You could realistically draw your own cards and make the metal strip from ~22-24ga sheet metal & a panel flanger. Then, I cut the panel shapes using a circular saw, jig saw & drill. You will use flathead rivets to attach the metal strip to your new door card.
Image


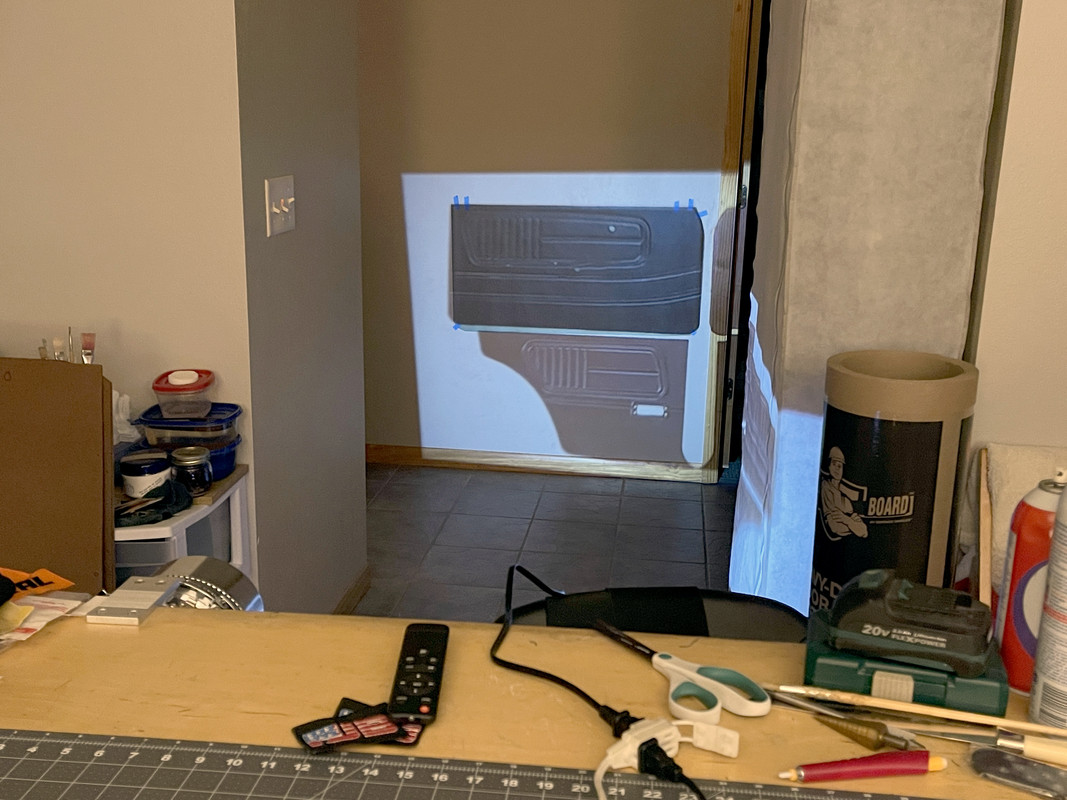
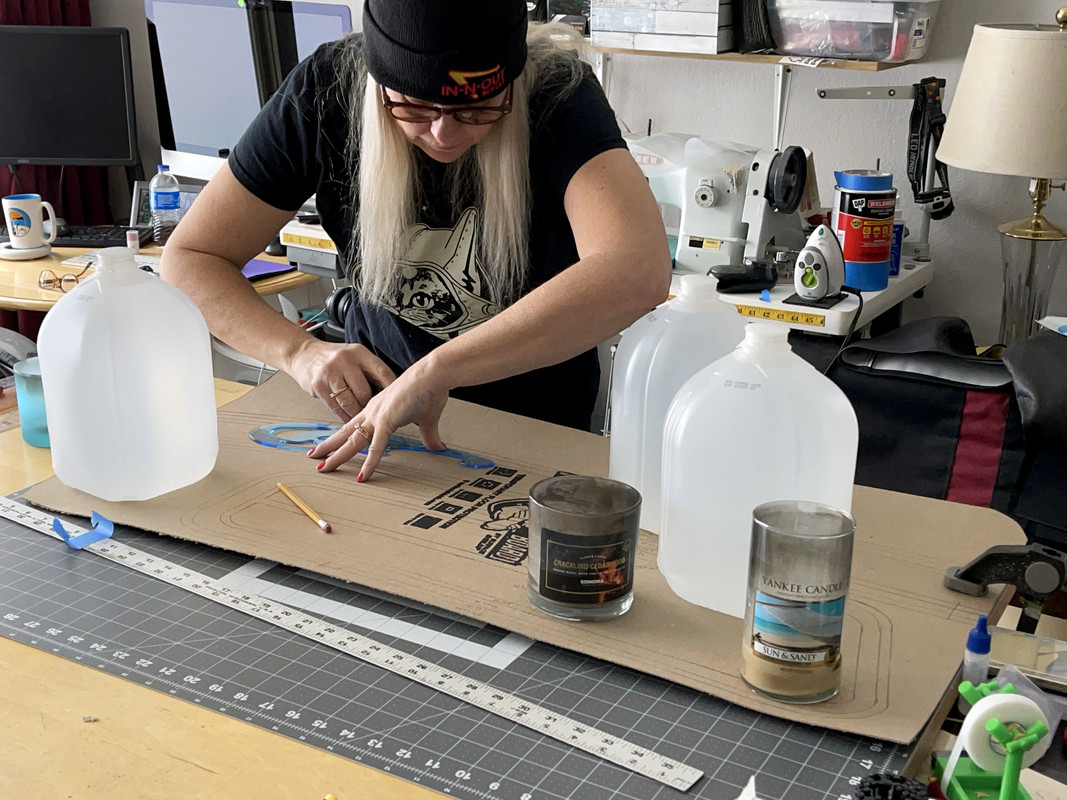
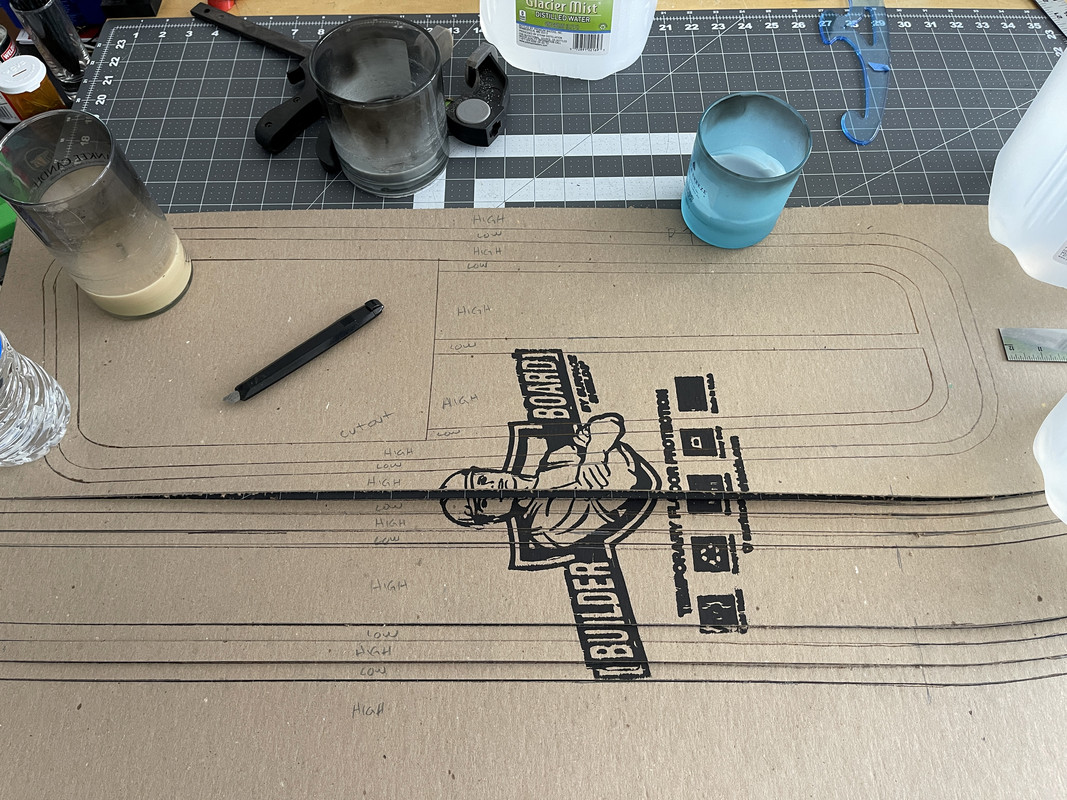
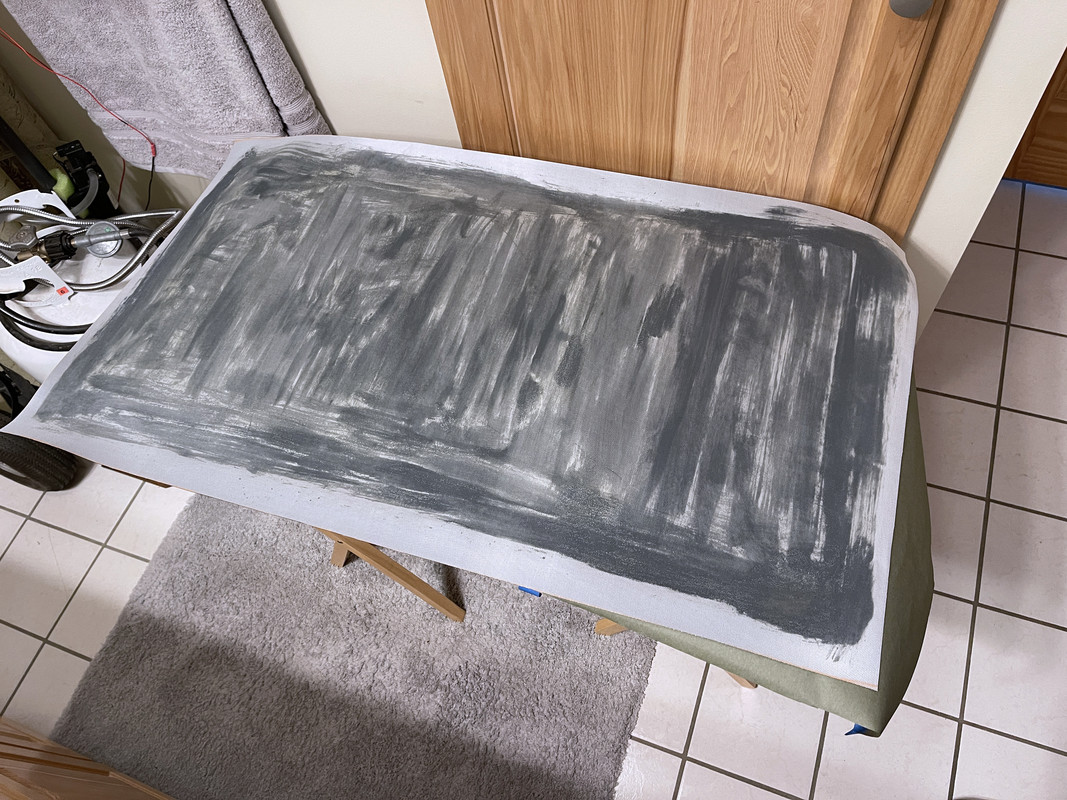
2) I traced the cards onto paper and Builder Board (thick cardboard). I then taped the paper to the wall. I used a mini projector to project an image of the stock panels onto the paper. I adjusted the size until it was a perfect match. I used chalk to kind of sketch out the original lines onto the paper door card. Once that was finished, I cleaned all the lines up using a pen, compass, and ruler to make sure everything was clean and symmetrical (I'm picky that way).
Image


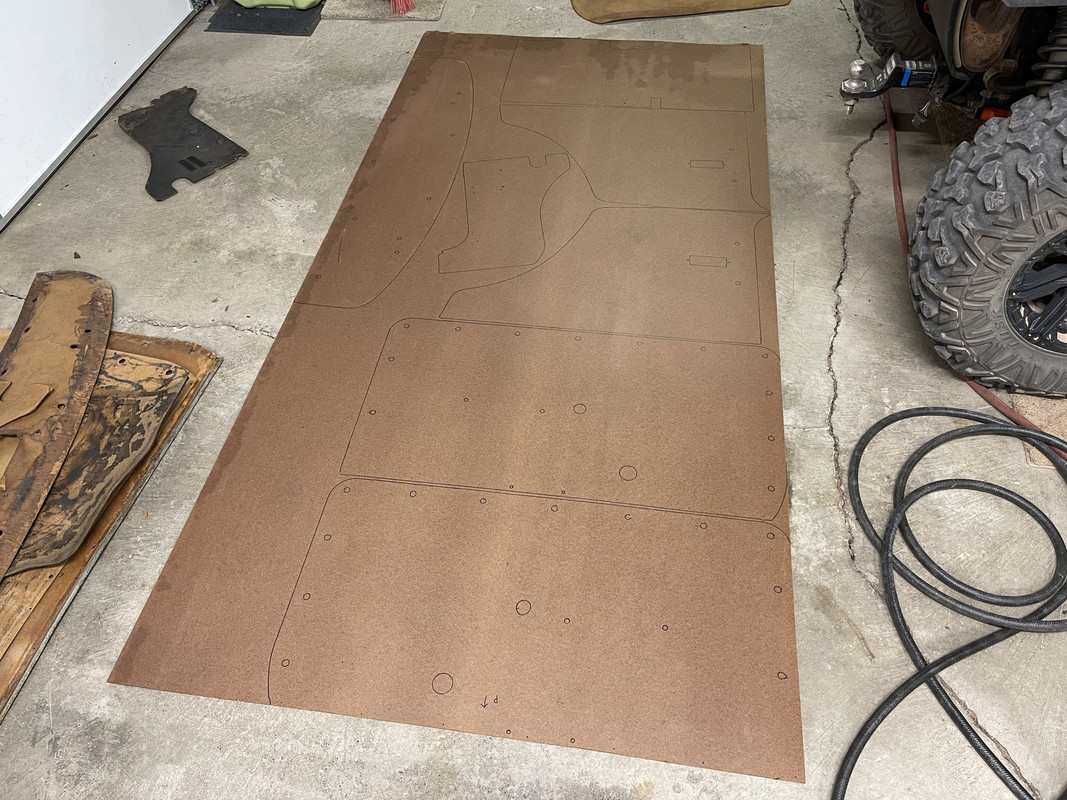
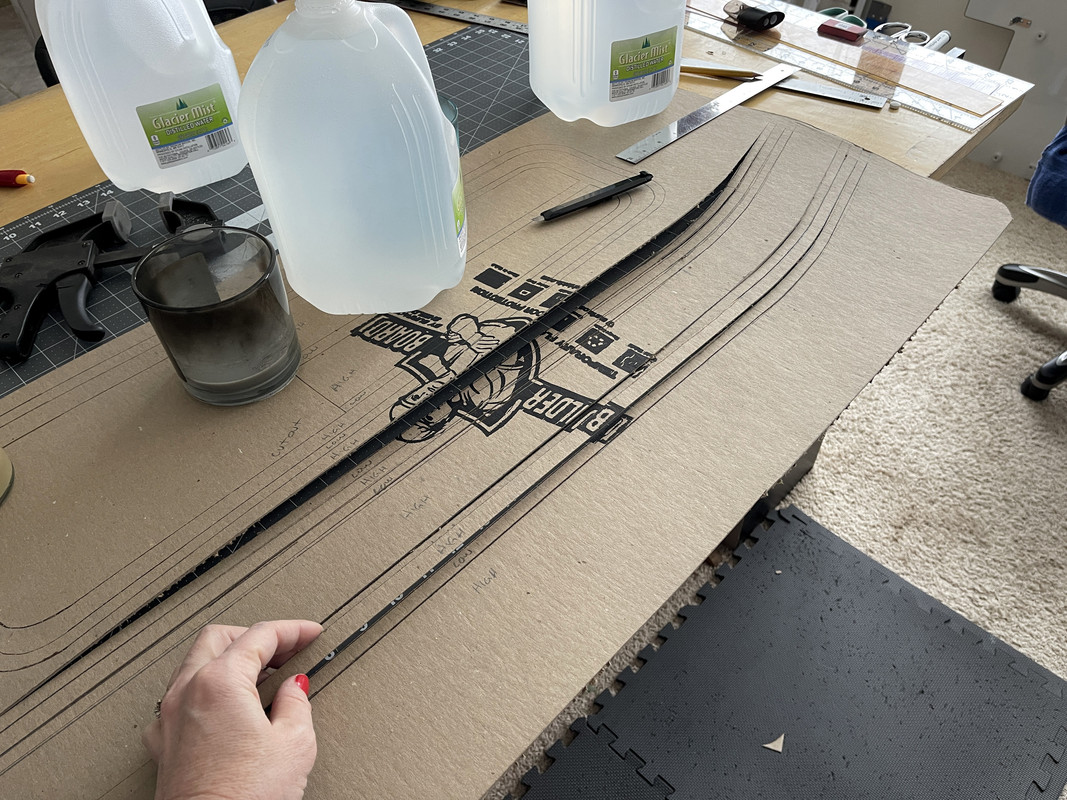
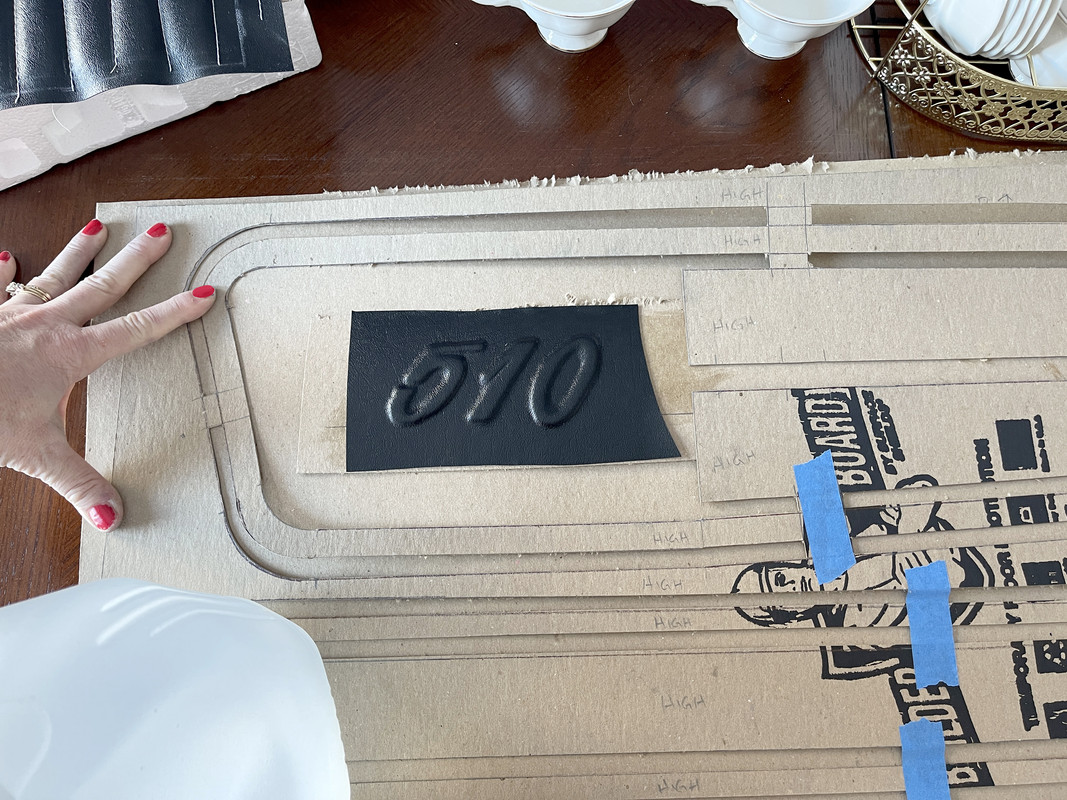
3) I used a sheet of carbon paper to transfer the lines onto the Builder board, again using a measuring stick, French curve & compass (or different-sized jars for different-sized curves). The builder board is used to give your design its texture (high & low areas).
Image

Image


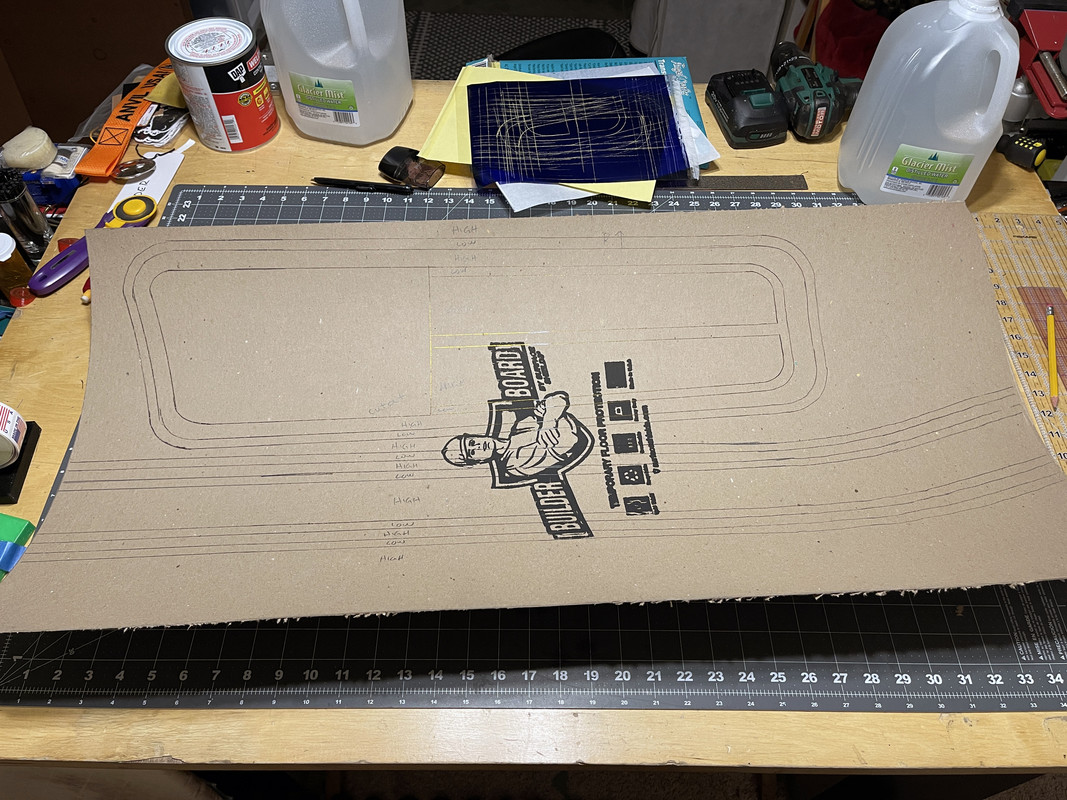
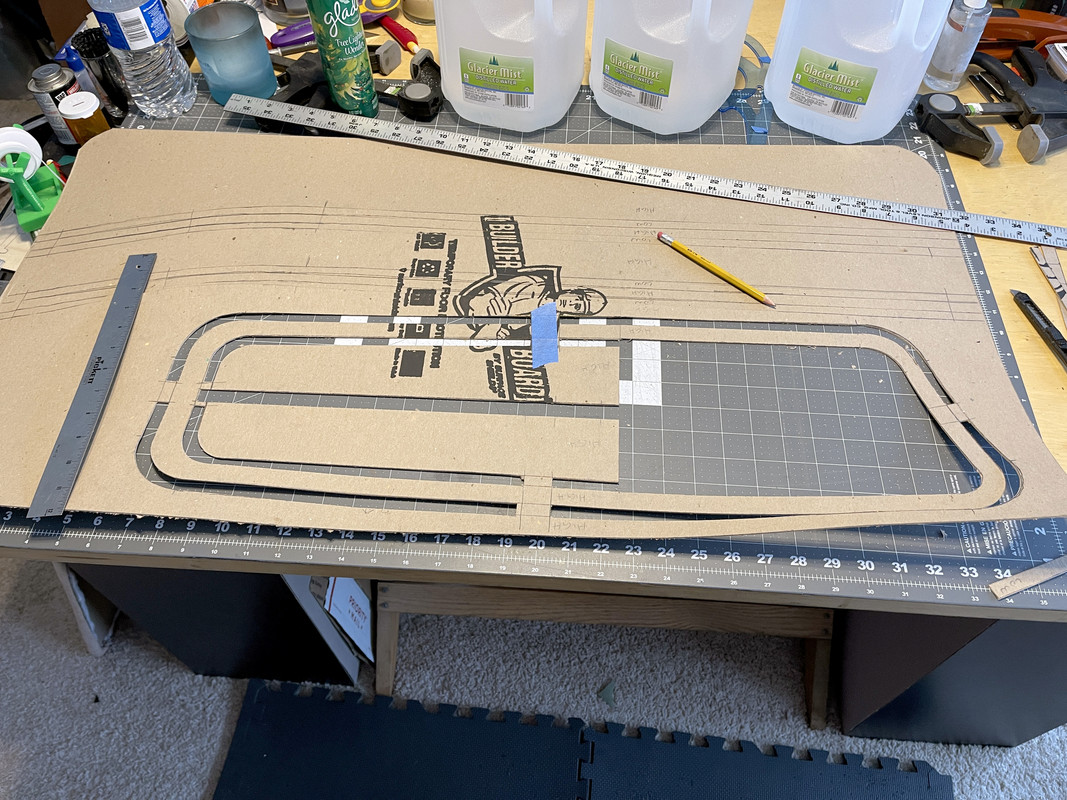
4) Cut your design out of the builder board. Use a straight edge & a snap knife. Be accurate because the vinyl hides NO sins. I left "bridges" to hold the design together so I could trace it onto the new door card then I cut the bridges away. I numbered each piece and each section on the door card so I knew where to lay each piece.
Image

Image

Image

Image


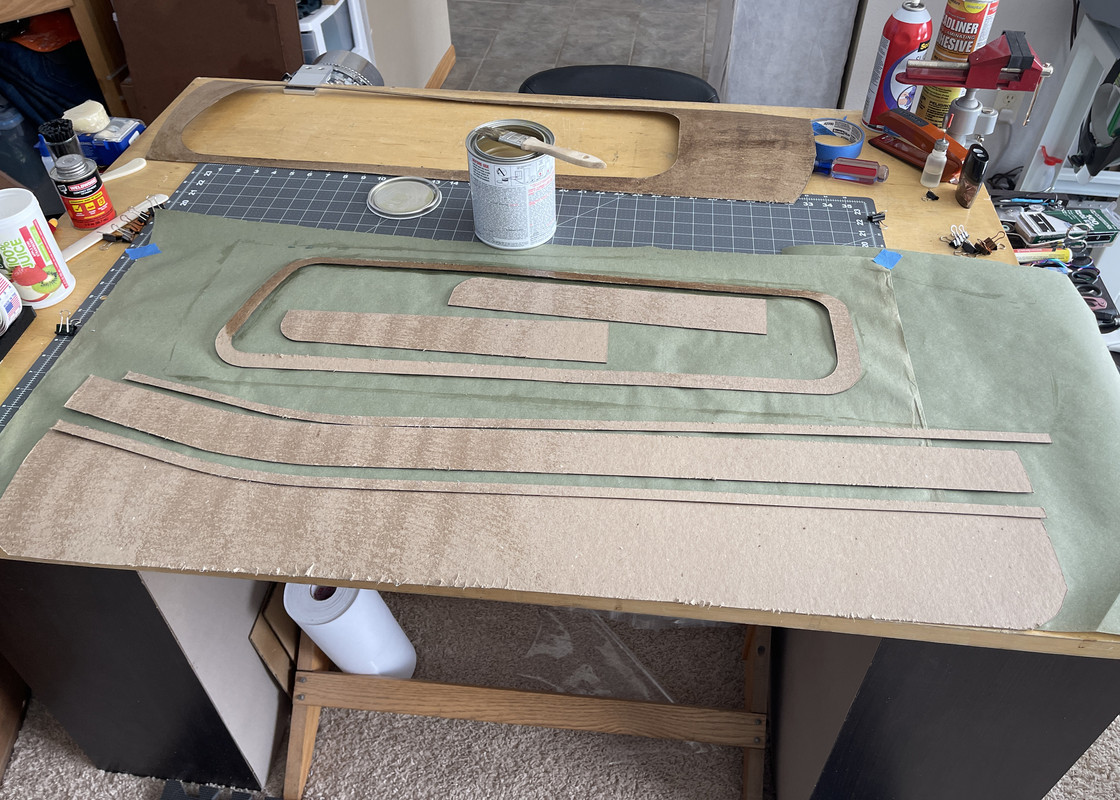
5) Once everything is cut out and ready to go, flip it over and trace it onto another piece of Builder Board for the other door (why do all the fussy stuff twice?!). Then put an even coat of WeldWood Contact cement or WeldWood Landeau top adhesive on the face of the door card and the back side of your Builder Board. Let it tack out for about 10 minutes or so. You have exactly ONE shot at placing the strips in place correctly. The easiest way to place them accurately is to take a long piece of wax paper (like you probably have in your kitchen) and cover the area you don't want the strip to stick to then slowly remove it as you stick the builder board strip in place. The adhesive will not stick to the wax paper so you can place it accurately without worrying about it touching where you don't want it to. Seriously, use the wax paper.
Image

Image


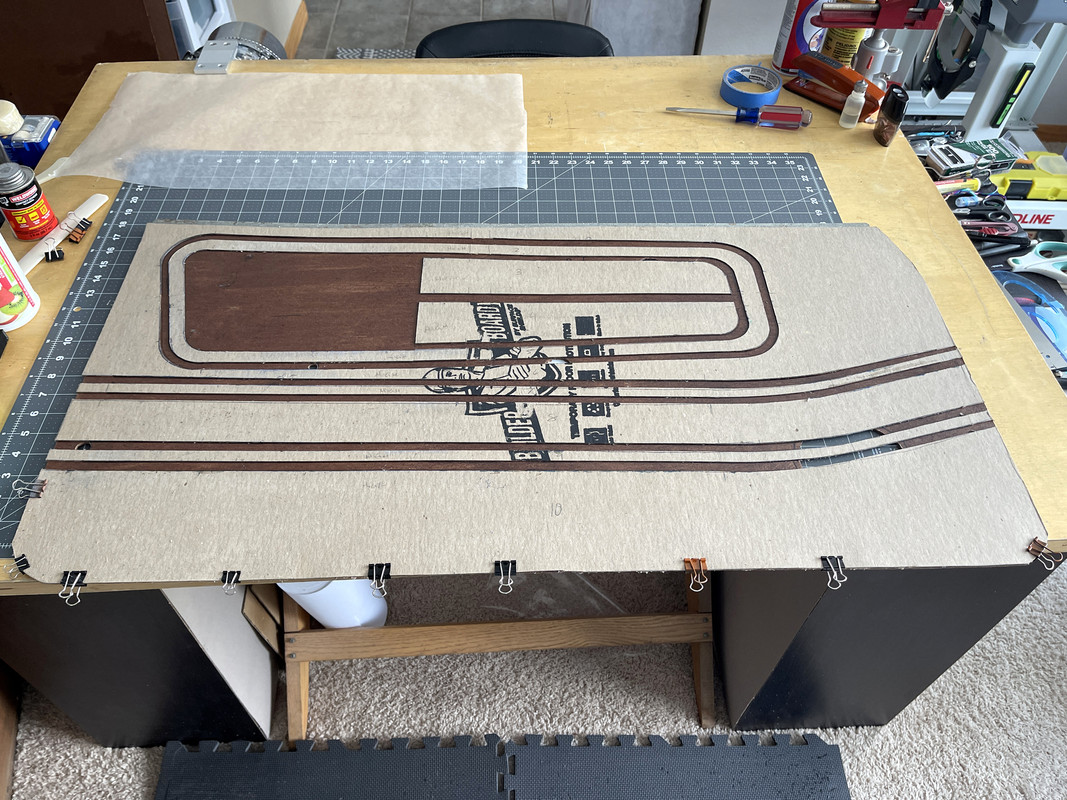
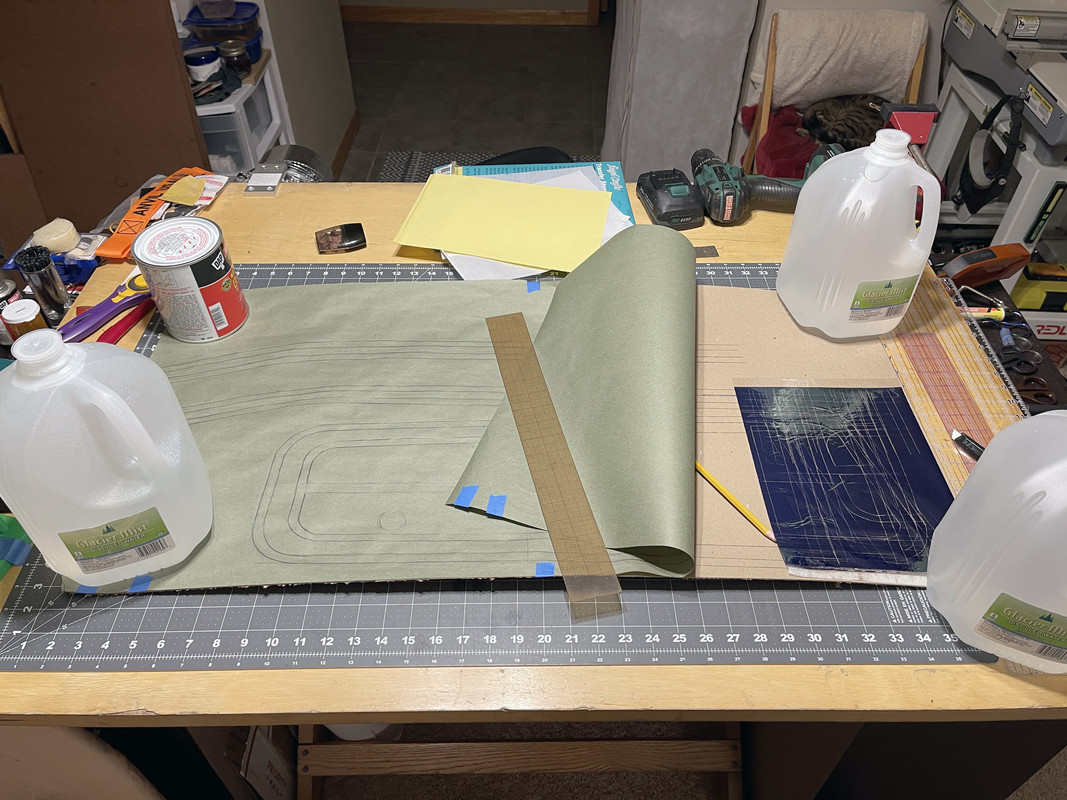
6) When your entire design is glued to the new door card, you're ready for the vinyl! It's kind of more of the same! Evenly glue the back of the vinyl and the front of the builder board and the door card. Be sure to get cement on every surface, including the vertical edges of the design so the vinyl will stick there. If you don't, you won't have sharp, crisp edges. Let it tack out.
Image


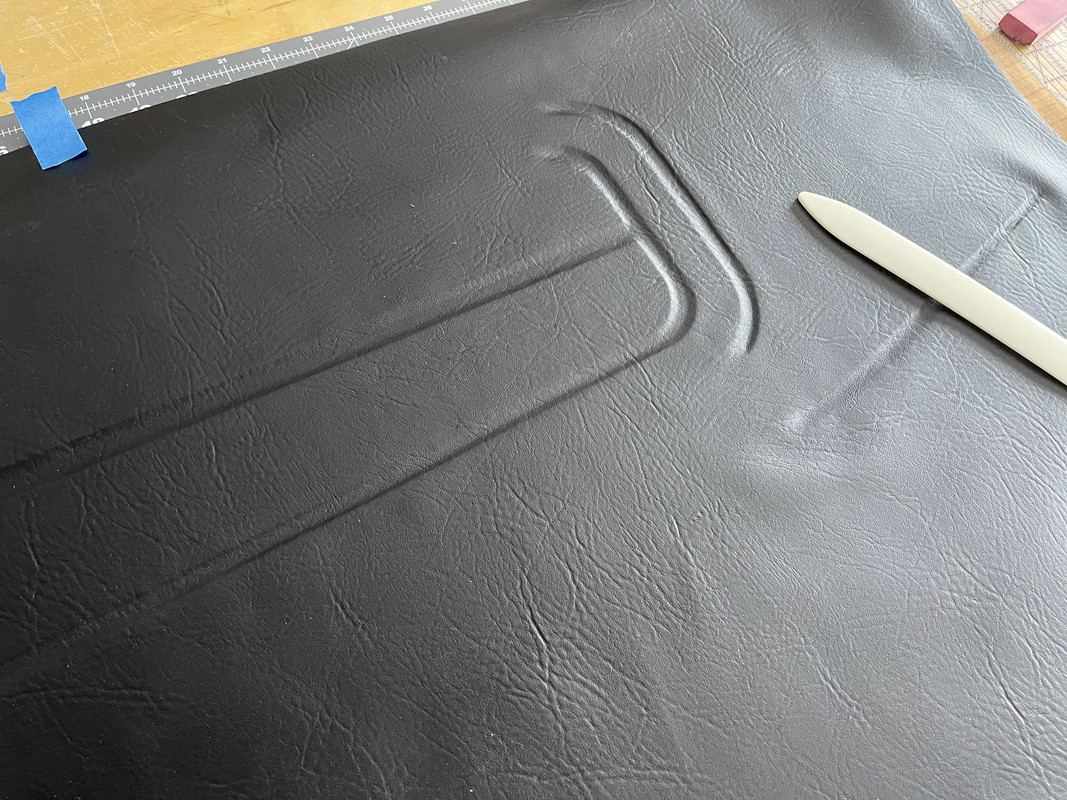
7) Lay the vinyl on your table, glue side up, and lightly place the door card face down on it. This is the best way to ensure it's centered. Flip the whole program over so the vinyl is facing you. Using a bone folder (or any firm but not sharp item), start from the center and carefully slide along & press the vinyl into the grooves. You don't want to stick all the high surfaces down then try to "pack" it into the grooves; it'll stretch, warp, and won't stick well. Work from the center out, methodically working the vinyl onto every edge for a crisp, sharp look. If your tool is sticky on the vinyl you can put a dishcloth down between the tool & the vinyl so it slides. Just be mindful not to gouge the vinyl.
Image

Image


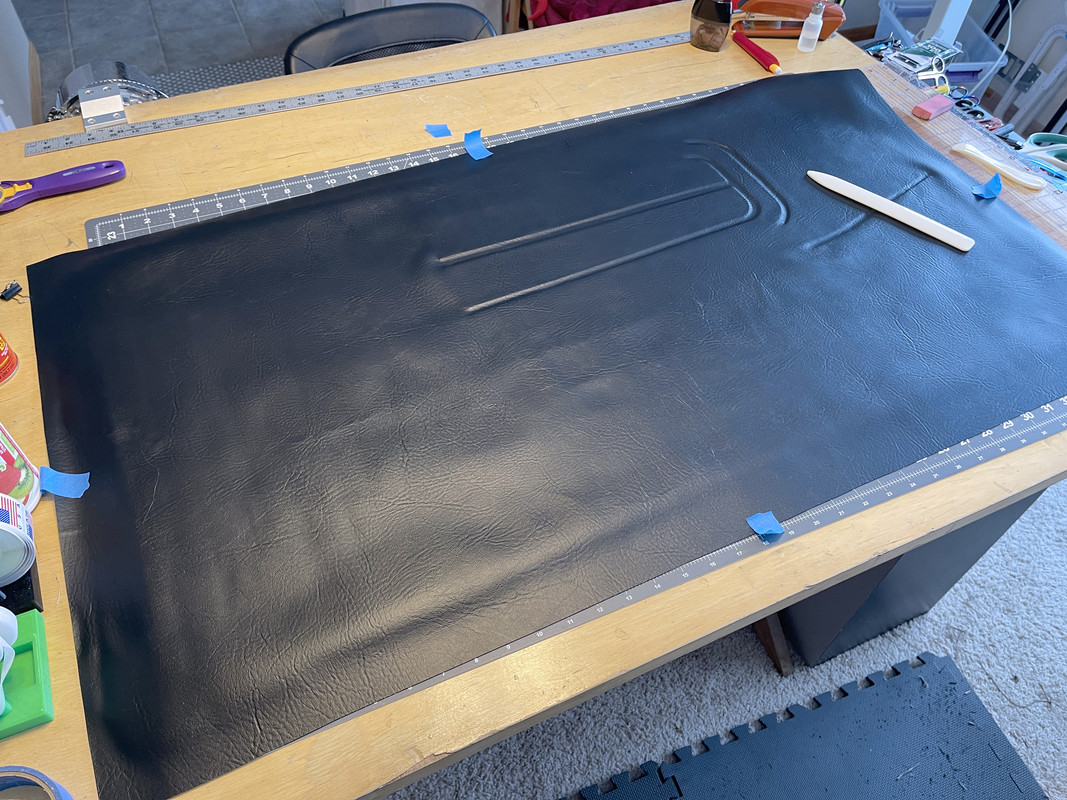
8 ) When that's done, you can fold the vinyl over the door card and glue it in place; again, be sure to put adhesive on BOTH surfaces where it's going to stick. Trim out and burnish down and puckers you have around the corners on the back.
Image

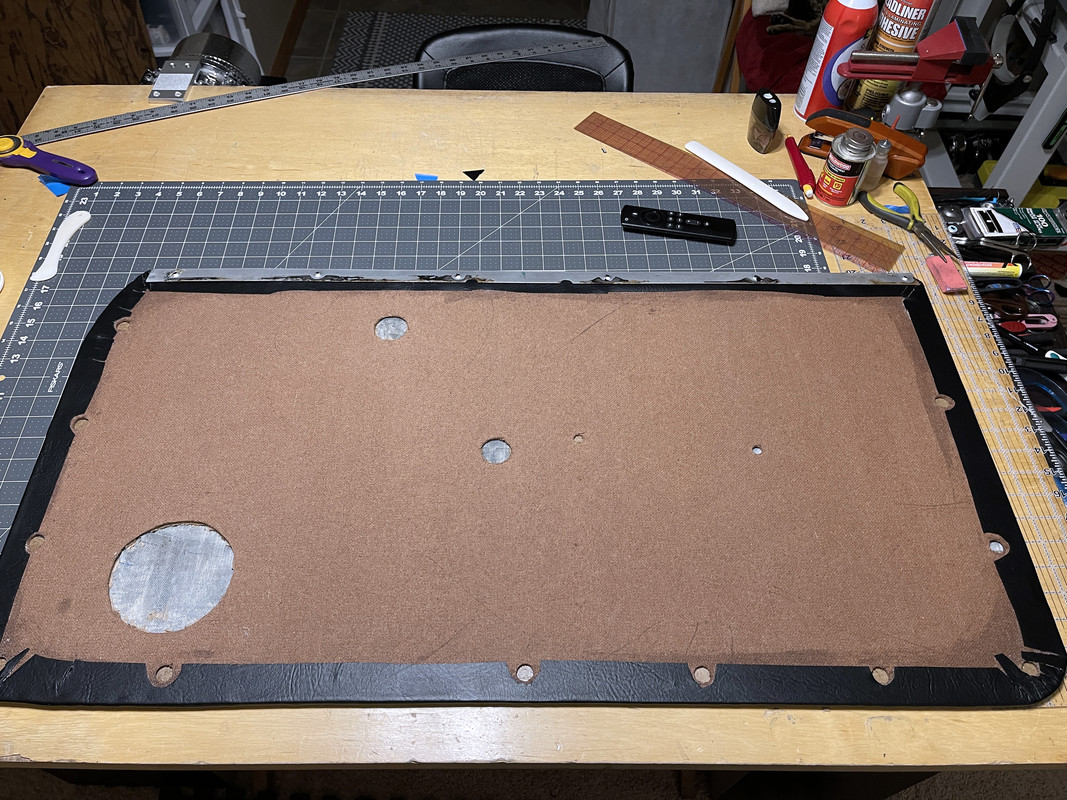
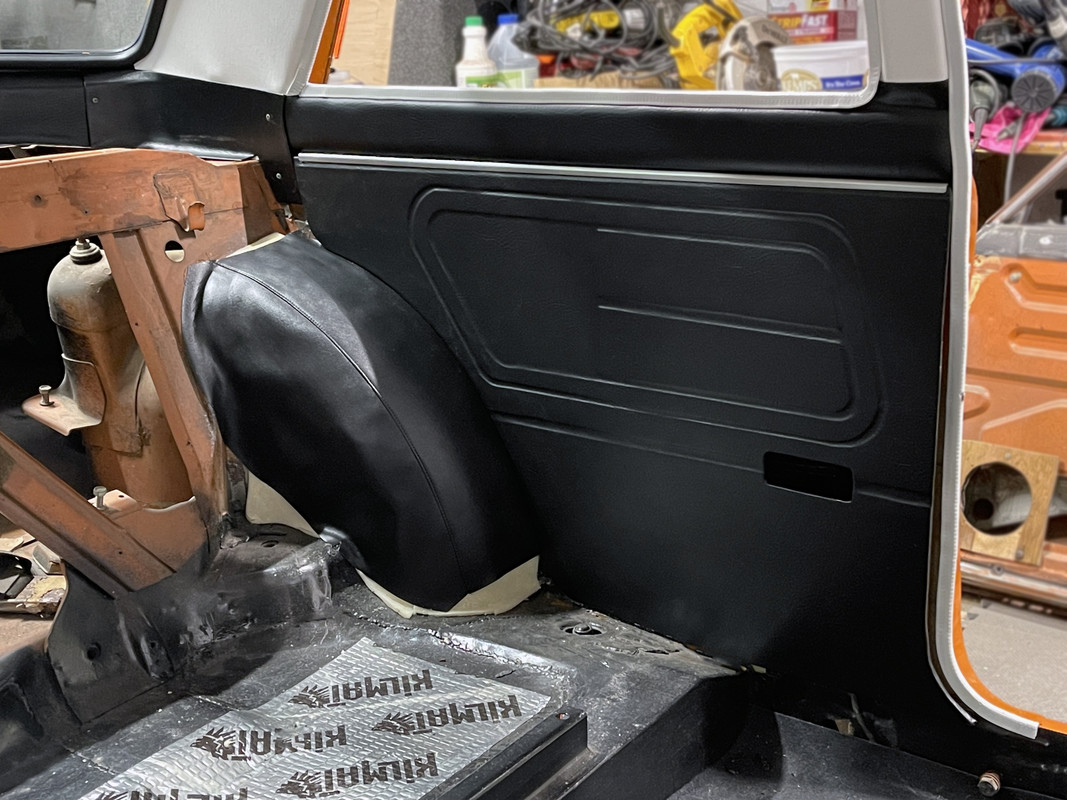
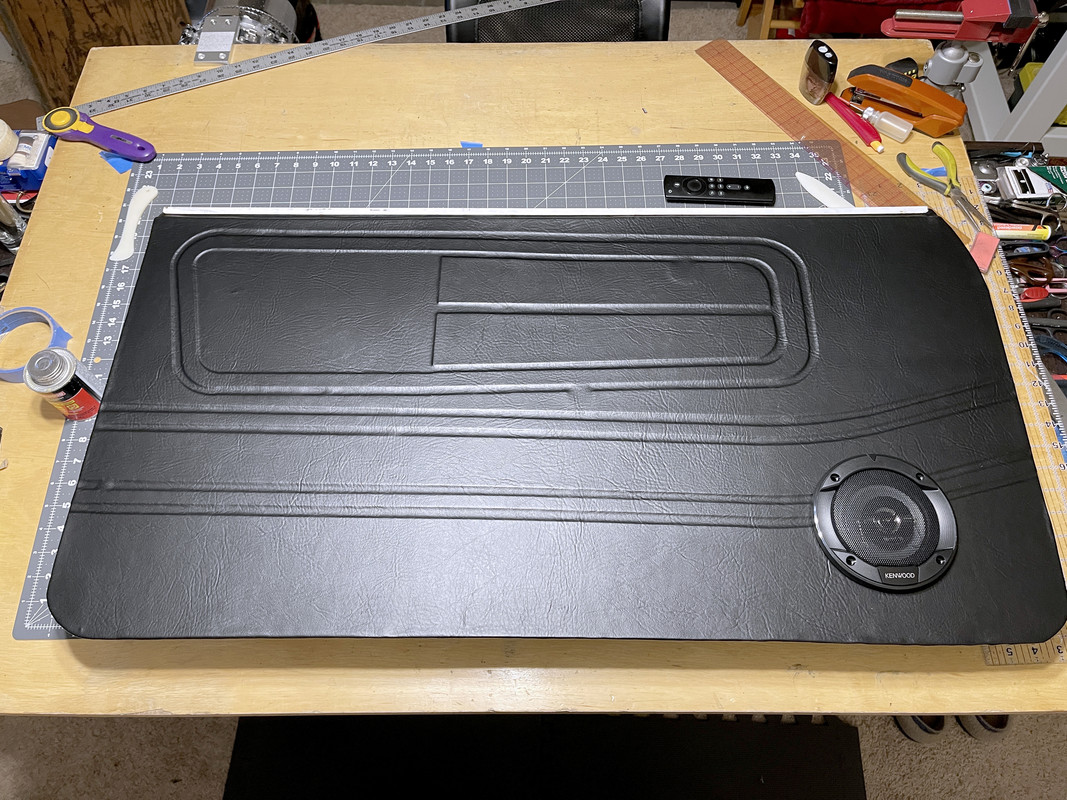
Here's my finished product.
Image


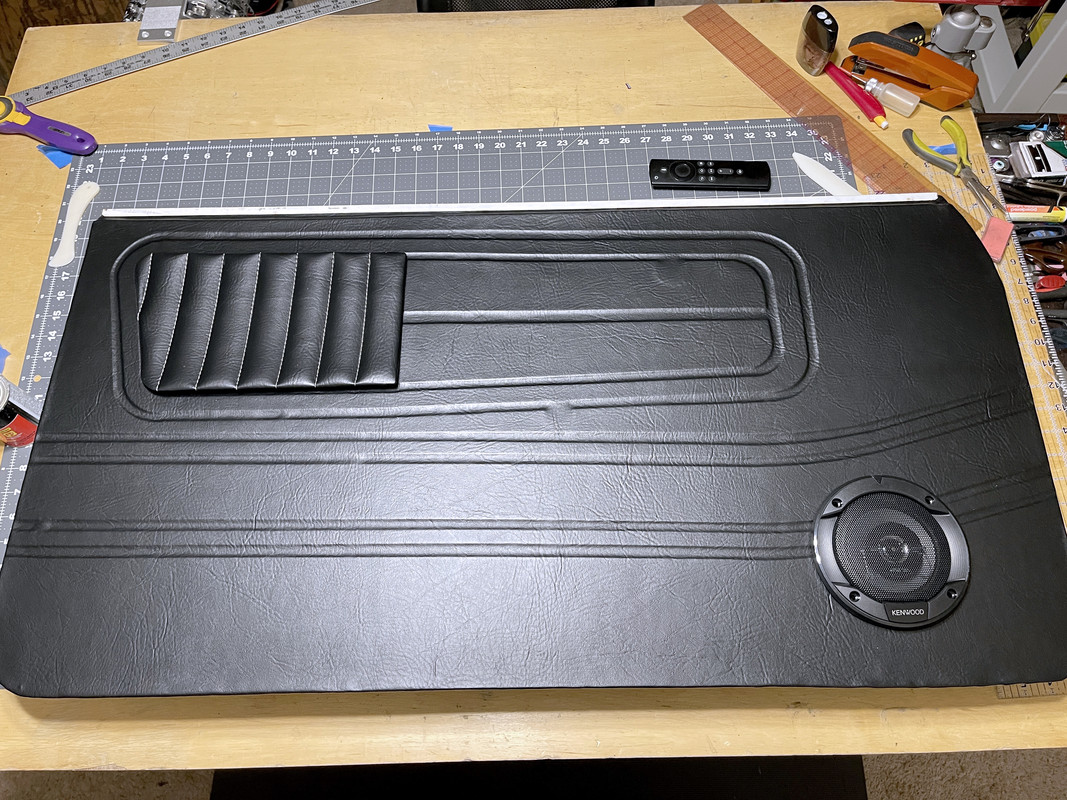
I also made a padded insert for above the arm rest. I used gray thread to match the subtle gray accents in my seats. I'm not sure if I'm going to use them though. I can't decide which way I like the panel more. I can add them at any time.
Image

**Just a couple of notes**
This contact cement STINKS!! It REALLY stinks. It makes car paint smell like an air freshener. Wear a respirator and use it in a very well-ventilated area. Normally, I don't pay much attention to that stuff but seriously. Also, the can says there's a risk of a flash fire if you use it in the same room as a pilot light or anything like that. Nasty stuff but it works great and has high heat resistance. WeldWood contact cement also comes in a spray form. It sucks. Don't bother.

Use a disposable brush to apply the glue because it's going right in the trash after. No saving it.

You can do ANY design you want with your panels. That's the real beauty of this technique. I just chose a simple stock look. But I considered this as my insert:
Image

And lastly, good luck with your project! I'm super happy with my panels!
RONSLYCHUK
Supporter
Posts: 783
Joined: 12 Sep 2004 19:42
Location: Abbotsford B.C.

Re: How-To: Door Panels

Post by RONSLYCHUK »

Excellent write up Rush. You ROCK!
User avatar
ostaylor
Supporter
Posts: 415
Joined: 19 Dec 2020 08:40
Location: Victoria, BC

Re: How-To: Door Panels

Post by ostaylor »

Wow, very talented and excellent end result - well done.
Regards,
Owen
70 Datsun 510 2 door - SR20DET - https://www.the510realm.com/viewtopic.php?t=34572
64 Studebaker Daytona - Supercharged 289 4 speed
65 Sunbeam Tiger MkI
User avatar
Rush
Supporter
Posts: 636
Joined: 23 Jun 2014 07:21
Location: Northern WI, From Simi Valley, CA

Re: How-To: Door Panels

Post by Rush »

Thanks!
yenpit
Posts: 1700
Joined: 07 Jul 2006 20:14
Location: Denver Colorado

Re: How-To: Door Panels

Post by yenpit »

Nice! 8) I agree with simple custom patterns. My 2c is that I never like seeing car model names or logos in custom upholstery ie door panels, seat headrests etc. Adding "510" or "Datsun" or "240Z" or "Camaro" or "SS" etc, is redundant to me! But, it is common, as LOTS of people do it :D
1973 510 2dr
1972 521 flat bed
1972 510 Wagon parts car
2009 Toyota Matrix S AWD

LOTS of 510 parts!
User avatar
Rush
Supporter
Posts: 636
Joined: 23 Jun 2014 07:21
Location: Northern WI, From Simi Valley, CA

Re: How-To: Door Panels

Post by Rush »

That's exactly what I thought. I have the embroidered "510" on the headliner, that's enough. That whole 90's "pro-mod" or "pro-touring" thing with logos on everything down to the mudflaps really isn't my jam.

...then again, maybe people would quit calling my car a Fiat! :lol:
iceman510
Posts: 502
Joined: 27 Jul 2015 19:05
Location: Howell, MI

Re: How-To: Door Panels

Post by iceman510 »

Excellent write-up and results. A couple questions and a comment.

How thick is that builder board?
Did you bevel the cuts in that material or does the vinyl flow smoothly enough over it to get that look (can see it in the closeup of picture 13)?
Is the contact adhesive you used grey in color, or is the that the landau stuff you mentioned? The Weldwood I used on the headliner was yellow.

Any my comment on the metal strip- that attaches to the door and the panel slides under it. It doesn't attach to the trim panel.

Very nice. I need to make panels for my 69 since those are not available as repros, and had not figured out how to do the embossing of the pattern.

Thank you.
User avatar
Rush
Supporter
Posts: 636
Joined: 23 Jun 2014 07:21
Location: Northern WI, From Simi Valley, CA

Re: How-To: Door Panels

Post by Rush »

The Weldwood cement I used is yellow but it does look grey on the back of the vinyl. It’s just because it “wets” the backing so you can see the black vinyl color through it. The landeau top stuff is yellow also but it wasn’t available locally.

I’ll have to measure the thickness of the builder board when I go in the house & get back to you. The cuts are as 90° as I could do them by hand. The vinyl will tuck on the vertical edge if you put adhesive on that edge. There’s kind of a fine line between enough & too much. You’ll get the feel for it. I do recommend getting a bone folder set. They’re cheap on Amazon & perfect for this job.

You’re right about the metal strip shown in the photo; that is off the car but there’s another strip that’s riveted to the door panel as well. I just slipped the piece that attaches to the car over the vinyl to kind of use it as a clamp. I hope that makes sense.

Edit to add, the Builder Board is 1mm thick.
Last edited by Rush on 23 Feb 2023 14:44, edited 1 time in total.
iceman510
Posts: 502
Joined: 27 Jul 2015 19:05
Location: Howell, MI

Re: How-To: Door Panels

Post by iceman510 »

Hmm, I don't recall anything riveted to the door trim. I will have to look again at the set I just took out of the race car.
User avatar
Rush
Supporter
Posts: 636
Joined: 23 Jun 2014 07:21
Location: Northern WI, From Simi Valley, CA

Re: How-To: Door Panels

Post by Rush »

I wonder if the older ones haven't got them? Mine is a '72.
You can see the strip at the top of the old panel here.
Image
Pjackb
Posts: 139
Joined: 11 Dec 2021 18:01
Location: Montreal

Re: How-To: Door Panels

Post by Pjackb »

Thank you so much for sharing this ,
I’ve been wanting to do custom door cards and rear panels for one of my roadsters and you just gave me the how to
User avatar
Rush
Supporter
Posts: 636
Joined: 23 Jun 2014 07:21
Location: Northern WI, From Simi Valley, CA

Re: How-To: Door Panels

Post by Rush »

You're welcome! Please post your results, I'd love to see them! :)
Pjackb
Posts: 139
Joined: 11 Dec 2021 18:01
Location: Montreal

Re: How-To: Door Panels

Post by Pjackb »

Thanks will definitely do
User avatar
Rush
Supporter
Posts: 636
Joined: 23 Jun 2014 07:21
Location: Northern WI, From Simi Valley, CA

Re: How-To: Door Panels

Post by Rush »

Here's one of the rear panels. I need to put the clips on & pop the ashtray in but you get the idea. If you decide to do this, just a few notes:
• Test fit before covering the panel in vinyl.
• On the rear panel (2 door) the builder board can't go to the top edge, make sure to leave about a 3/8" space otherwise the metal strip that holds the panel in place won't fit over the panel. Also, it doesn't hurt to shave the top edge of the door panel itself a bit so once it's covered in vinyl, it'll fit in the metal strip easier.
Image
Post Reply