
I very much appreciate the comments-- this thing has been a long time coming!
More updates soon,
Michael
Spriso's SR20DET Bluebird Coupe Project
Re: Spriso's SR20DET Bluebird Coupe Project
Michael Spreadbury
Spriso Motorsports
www.spriso.com
Spriso Motorsports
www.spriso.com

Re: Spriso's SR20DET Bluebird Coupe Project
Awesome progress! Looks so killer on the ground!!!!! We need an updated picture of the boy on the valve cover!!!!!!!!!!!! 
I can see why you changed the turbo clocking. I was just looking at mine and thinking how to make it work but not look stupid.
Where is your MAF?
I can see why you changed the turbo clocking. I was just looking at mine and thinking how to make it work but not look stupid.
Where is your MAF?
"People don't like it when shit doesn't match their rule of thumb." Sam
Re: Spriso's SR20DET Bluebird Coupe Project
Agreed, and done!PoorMtnKid wrote:Just had the chance to sit hear and read a little my self. What an amazing build , detail is amazing. Feature?
Michael, your detailed posts and clear photos are an absolute joy to follow and read. Your technical insight and project planning is always well presented and not hidden in code. And of course your craftsmanship and attention to detail is stellar.
Thank you for continuing to post and share your projects is such detail here on the Realm. Can't wait to see your project in person again.
Happy New Years Michael.
Byron
Love people and use things,
because the opposite never works.
because the opposite never works.
Re: Spriso's SR20DET Bluebird Coupe Project
Battery
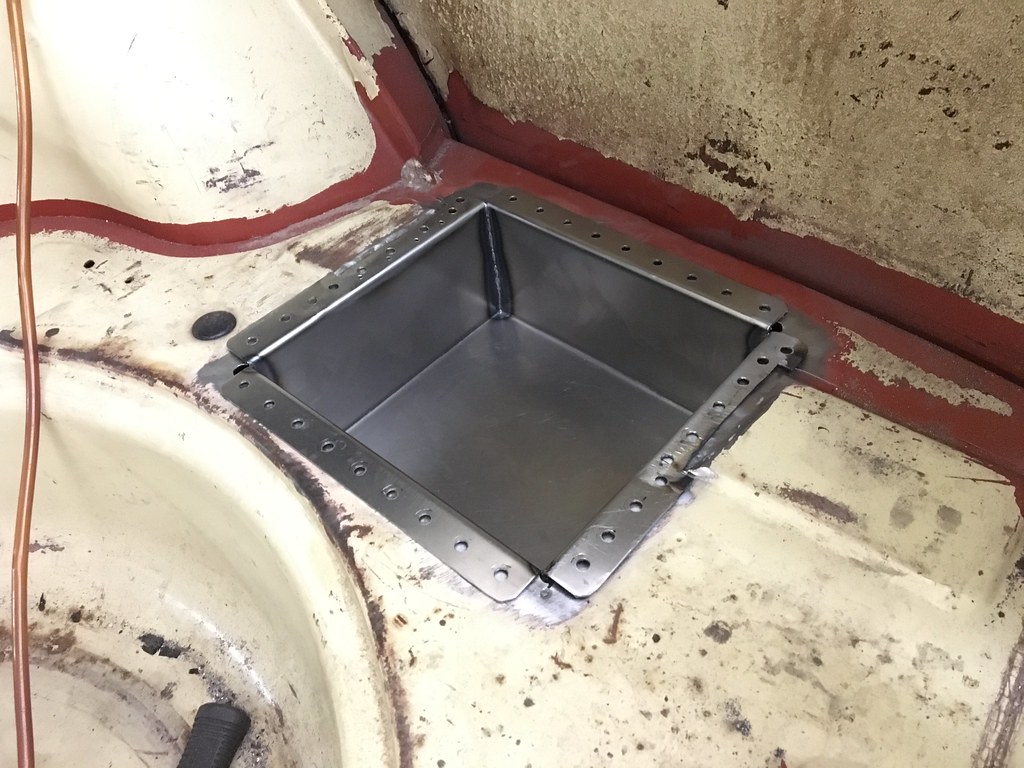
I wanted to get the battery out of the engine compartment, but did not want it surfaced mounted in the trunk. We have had really good luck with Odyssey batteries, so I designed a simple battery box to drop down into the trunk. This box needed to be a compromise, I did not want it too deep where it would be visible from the rear (or side of the car), and also the height needed to be friendly to work well with the power lead cable (as I will be running it internally).
I made a simple box on my sheet metal brake, carefully measured out the trunk floor, and dropped it into the floor:
Battery test fit--
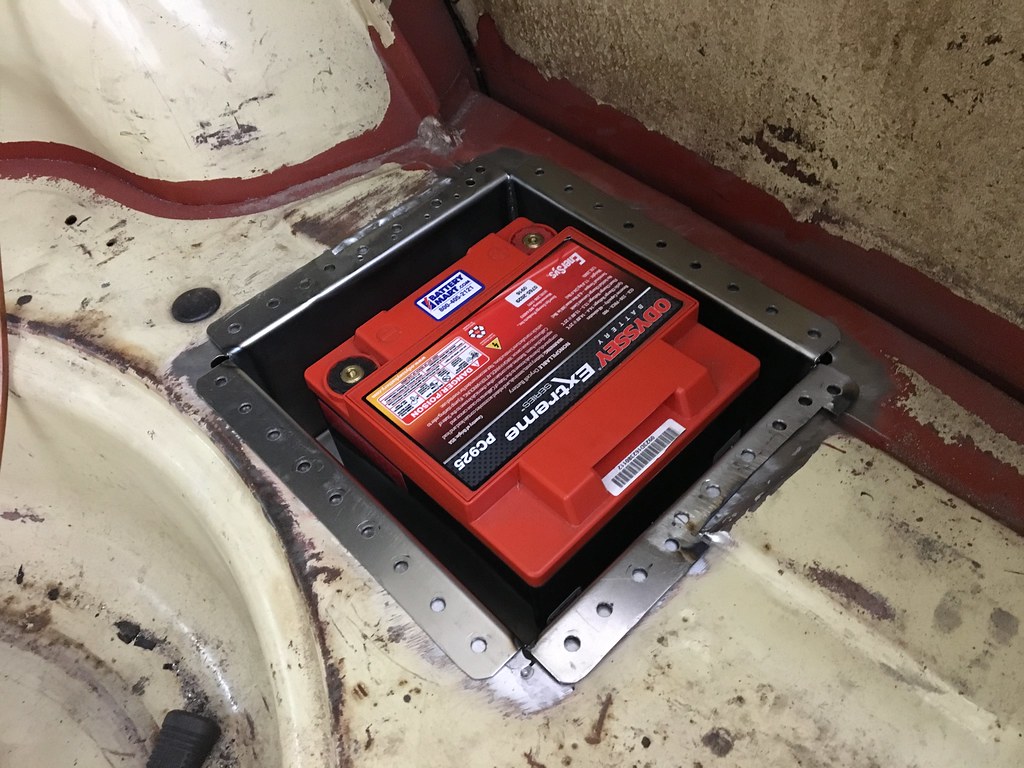
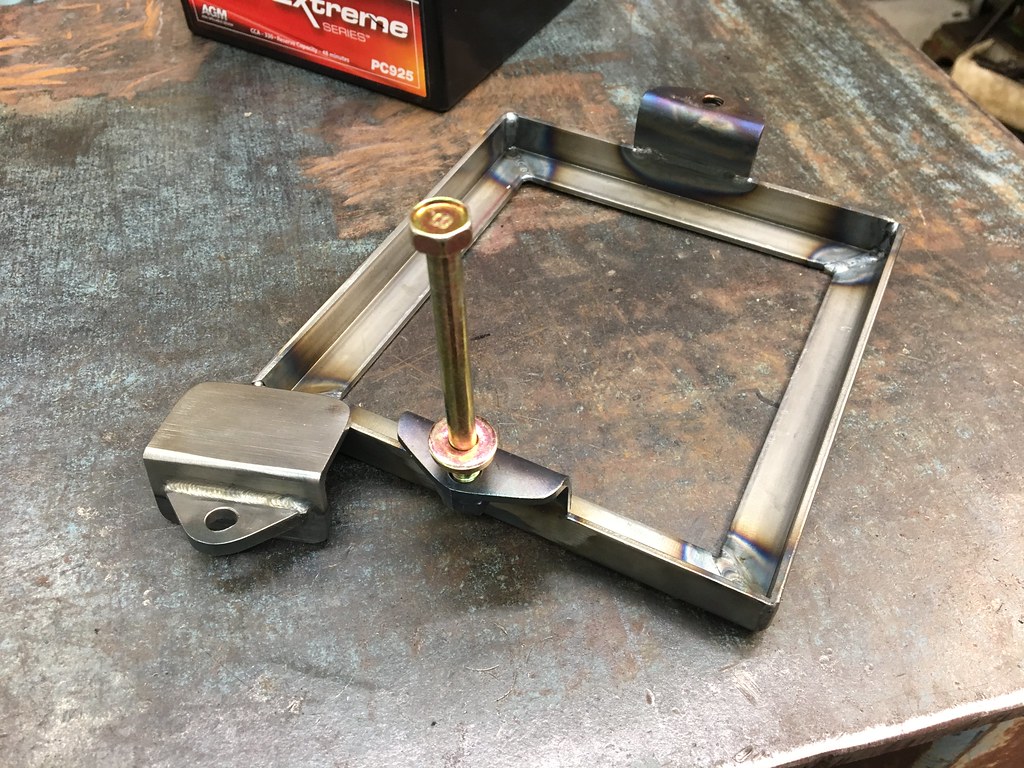
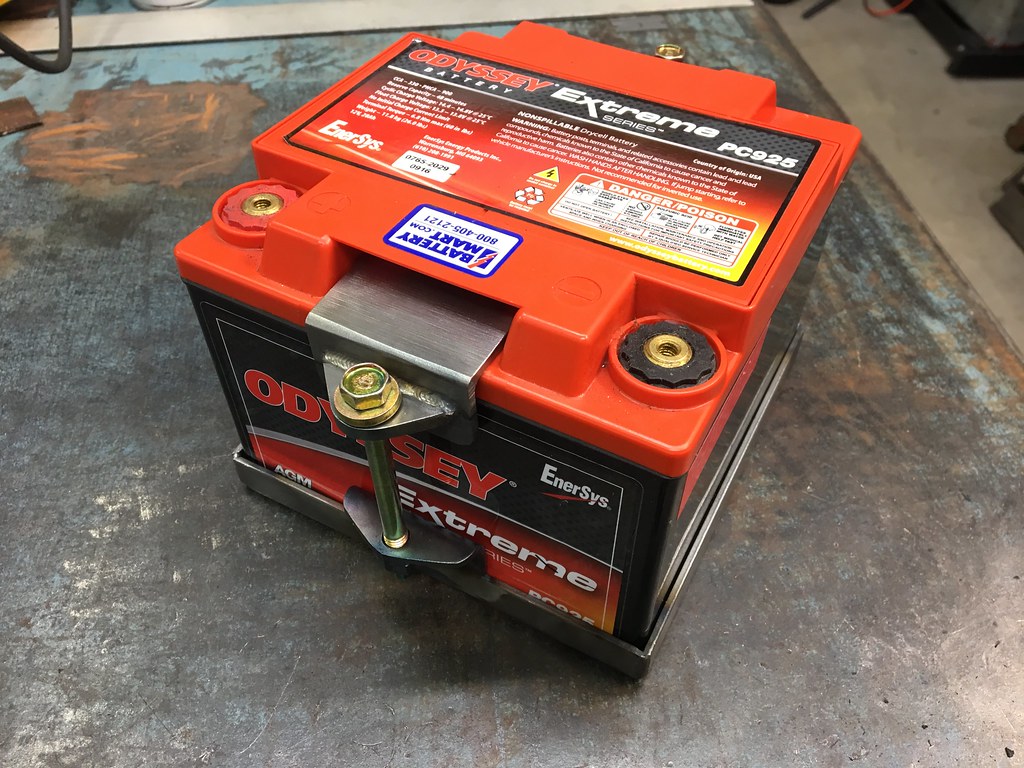
The battery sits in a simple frame and clamp system:
The box was spot welded in, welds ground down, and splashed some color onto it-- this is all temporary as it will be painted properly when the car is torn down for painting in a few years, but should work well for now.
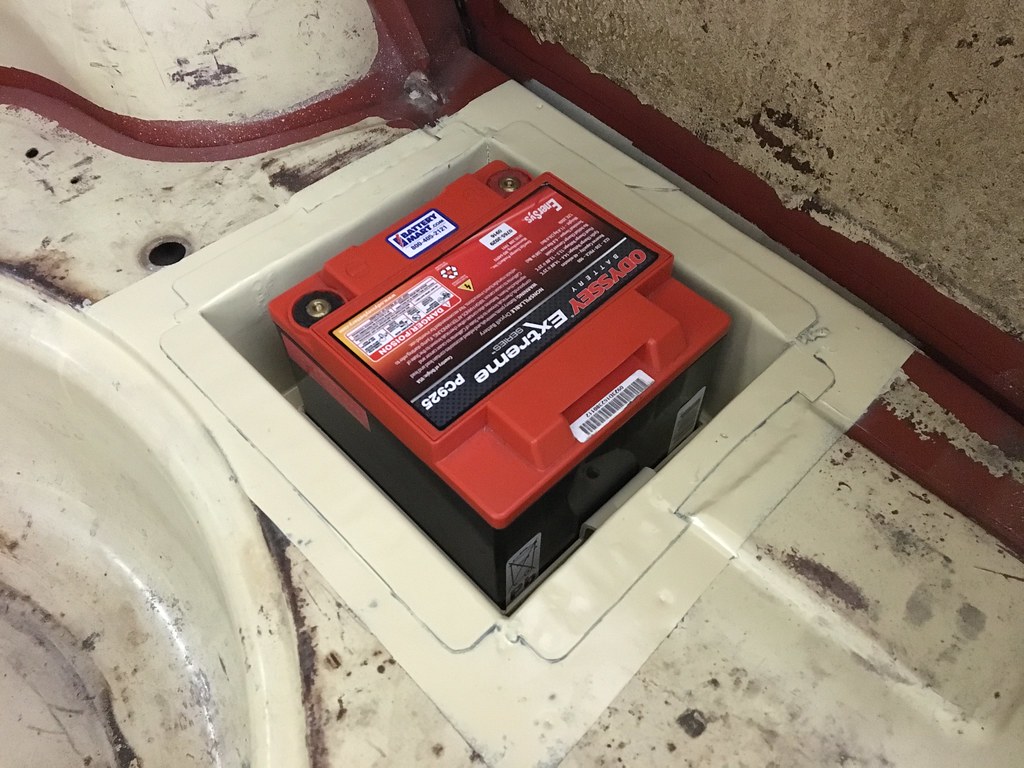
I will make a nice, sheet metal cover for the battery to protect the battery, but thought I would share a little progress...
Michael
I wanted to get the battery out of the engine compartment, but did not want it surfaced mounted in the trunk. We have had really good luck with Odyssey batteries, so I designed a simple battery box to drop down into the trunk. This box needed to be a compromise, I did not want it too deep where it would be visible from the rear (or side of the car), and also the height needed to be friendly to work well with the power lead cable (as I will be running it internally).
I made a simple box on my sheet metal brake, carefully measured out the trunk floor, and dropped it into the floor:
Battery test fit--
The battery sits in a simple frame and clamp system:
The box was spot welded in, welds ground down, and splashed some color onto it-- this is all temporary as it will be painted properly when the car is torn down for painting in a few years, but should work well for now.
I will make a nice, sheet metal cover for the battery to protect the battery, but thought I would share a little progress...
Michael
Michael Spreadbury
Spriso Motorsports
www.spriso.com
Spriso Motorsports
www.spriso.com
Re: Spriso's SR20DET Bluebird Coupe Project
very nice
Progress is slow, but it is progress non the less.
Re: Spriso's SR20DET Bluebird Coupe Project
Inching Forward
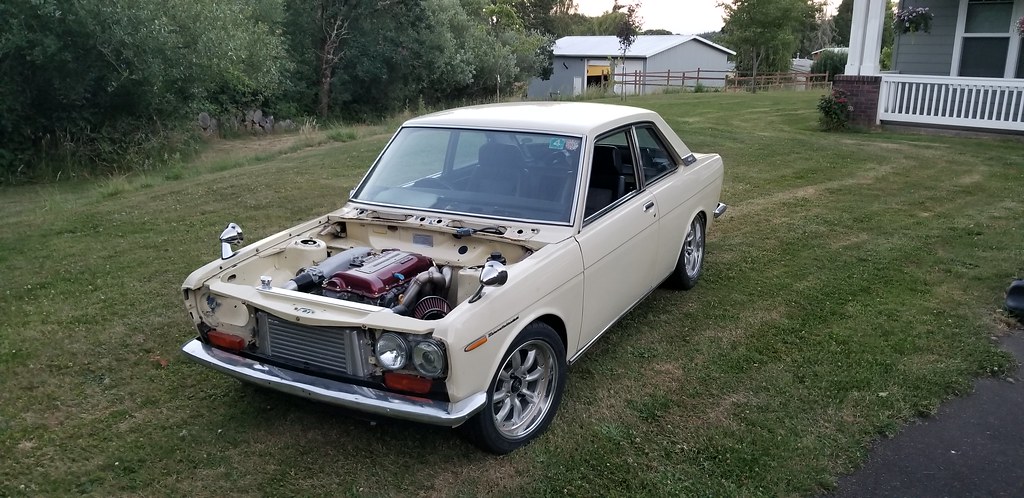
Work continues on the Bluebird in between work commitments and customer projects. Over the summer, we had a great BBQ at Spriso HQ and I bolted on some sheet metal to remind me what this thing actually looks like and drug it out of the shop for some Oregon sunshine:
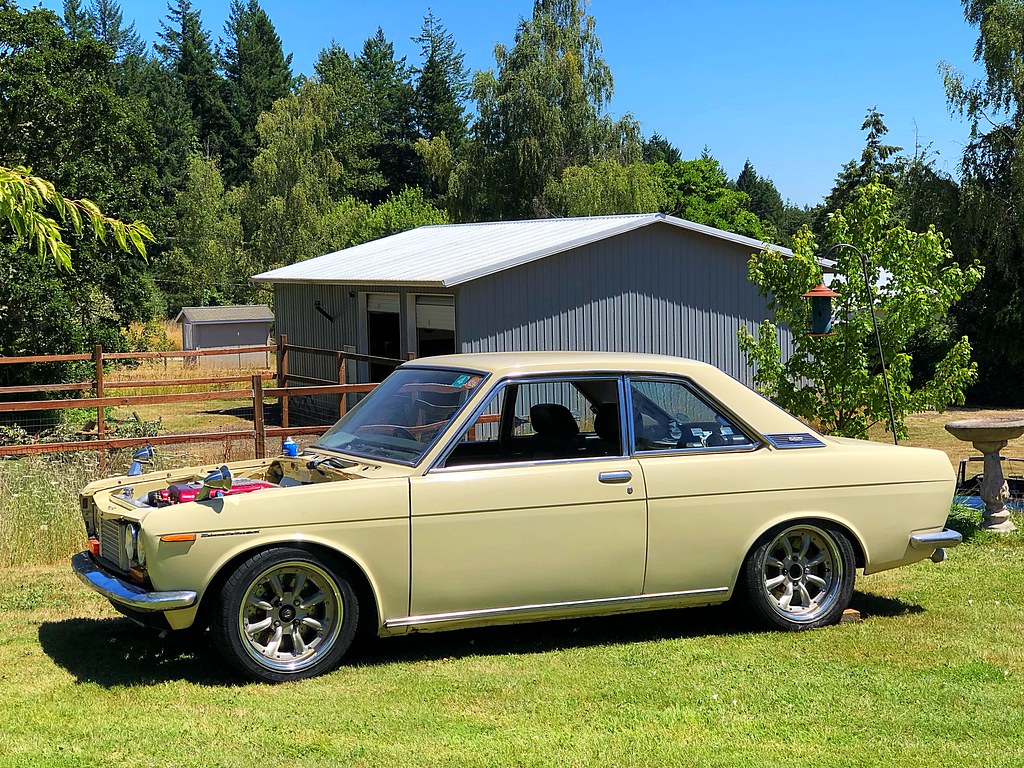
It does not look that good in person, but it was inspiring to see it out again. At the end of the day, it was time to push it back into the shop...
Then it was time to finish the fabrication work-- Eric Straw came down and he and I knocked out the 3" mandrel bent, stainless steel exhaust:
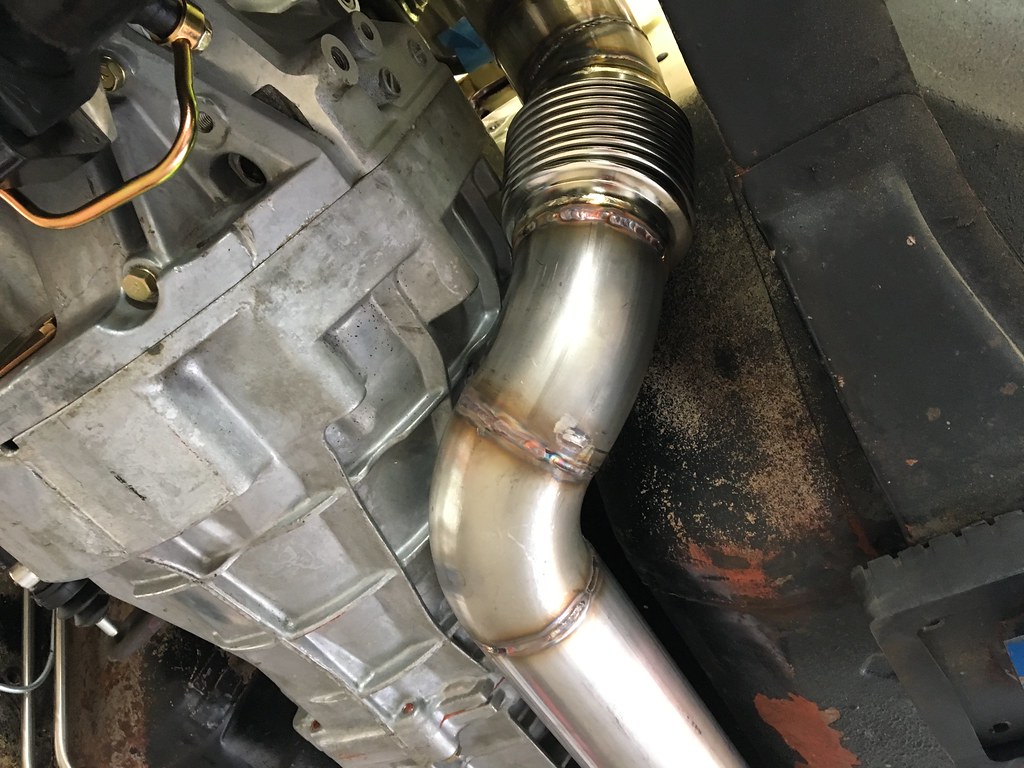
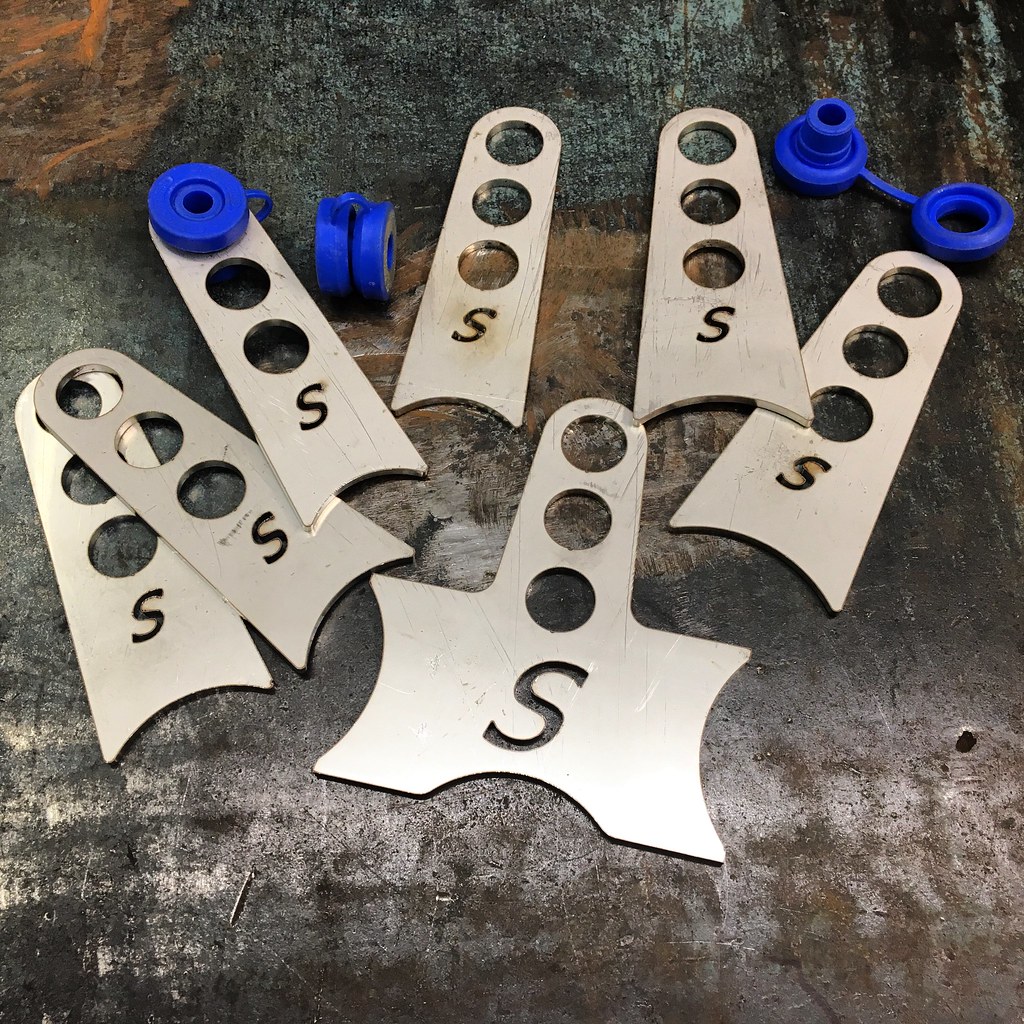
We used some of the custom made stainless steel exhaust hangers that we had made for our SR20DE/T powered Datsun Roadster projects:
I'll update this thread with more images from the exhaust build....
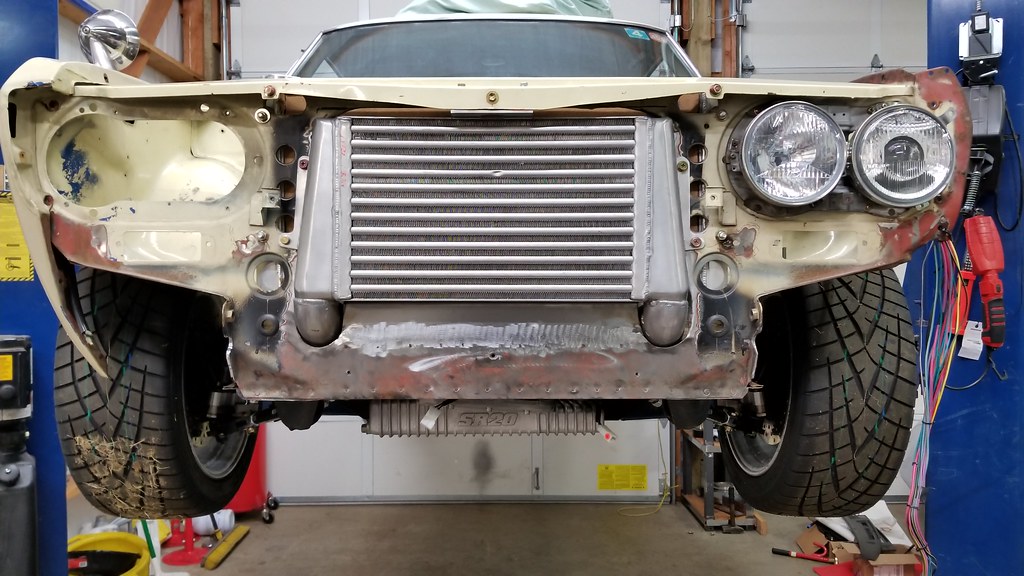
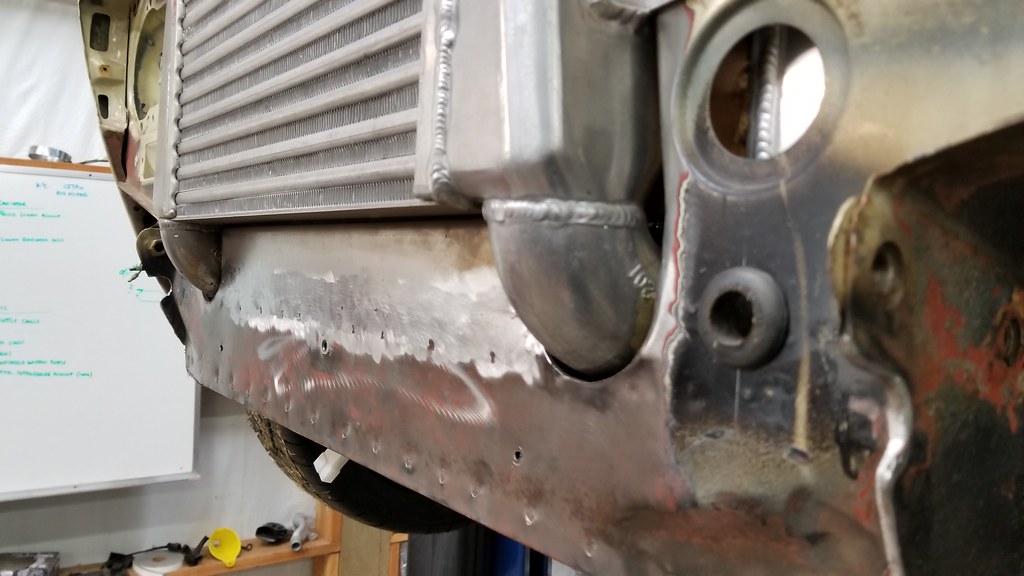
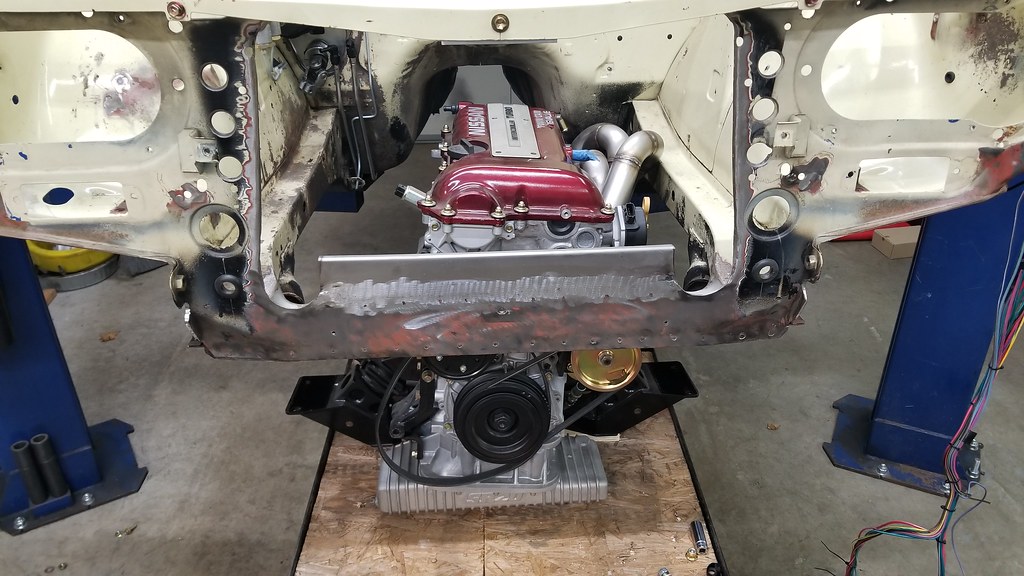
Then it was time to finish a few last details on the mechanical side before doing some paint work in the engine compartment. The area under the intercooler was still open, and needed to be finished off so the air is forced thru the intercooler into the radiator:
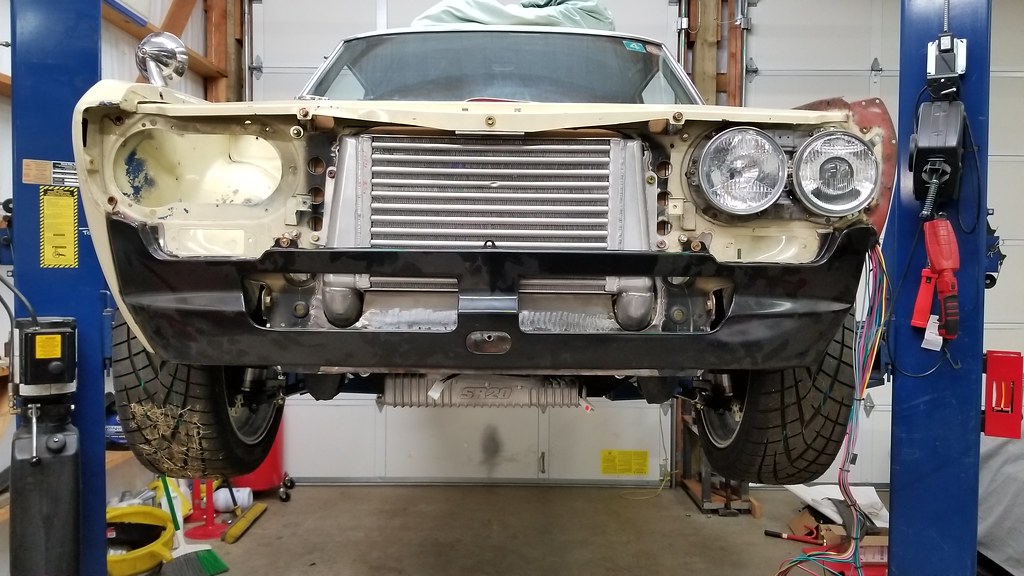
And with the valance back on the car:
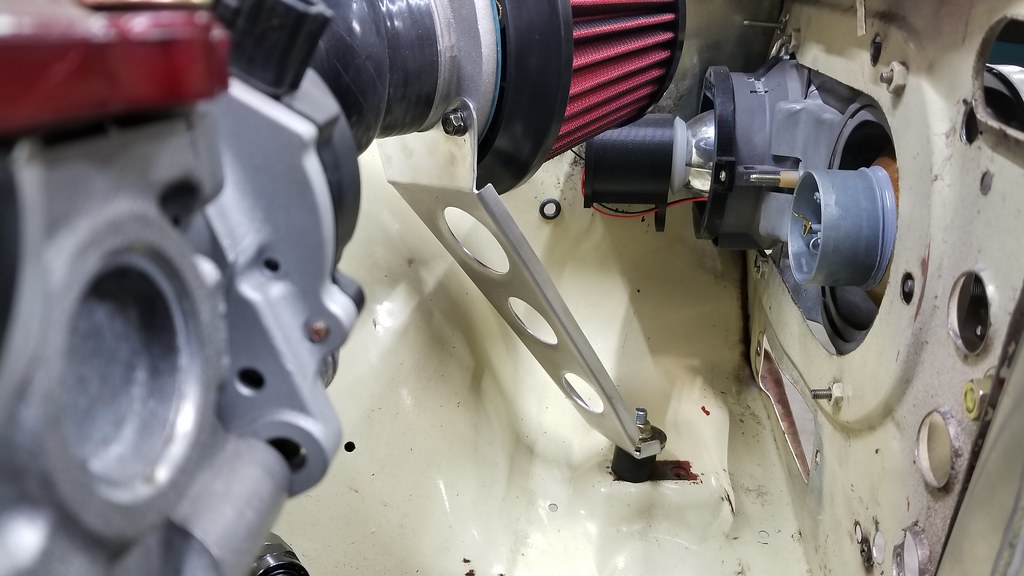
A simple bracket was made to support the air cleaner assembly:

Then everything was pulled back out of the car to deal with the engine compartment body work:
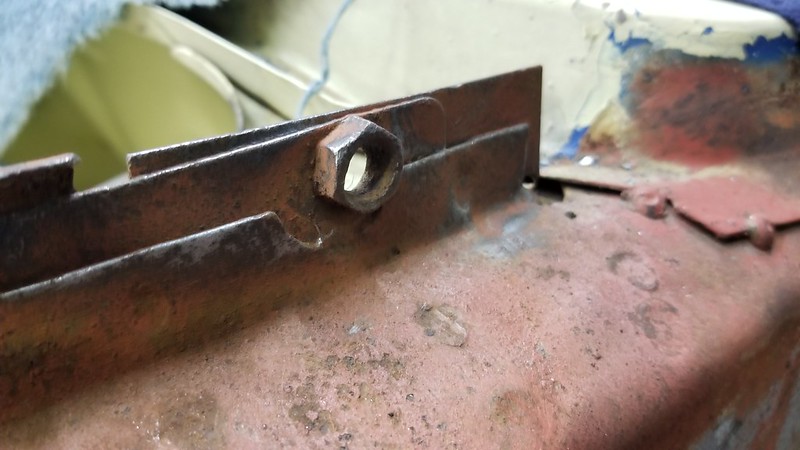
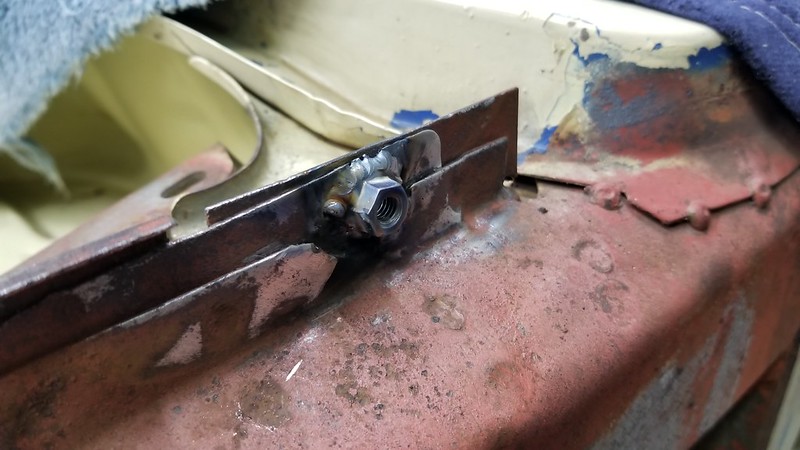
The last few nights I have been welding up the million holes, etc that all need to be dealt with before the engine compartment is repainted. This fender nut had been stripped and I have been staring at it for years-- and tonight it was dealt with...

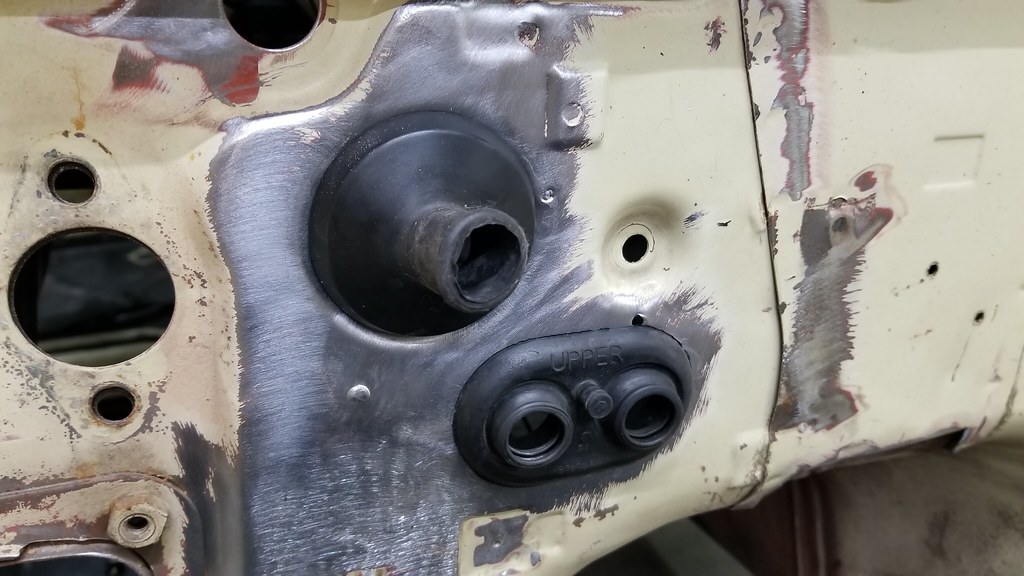
And finally, the heater hose outlet (to suit a SR20DET) and the new EFI wiring harness holes:
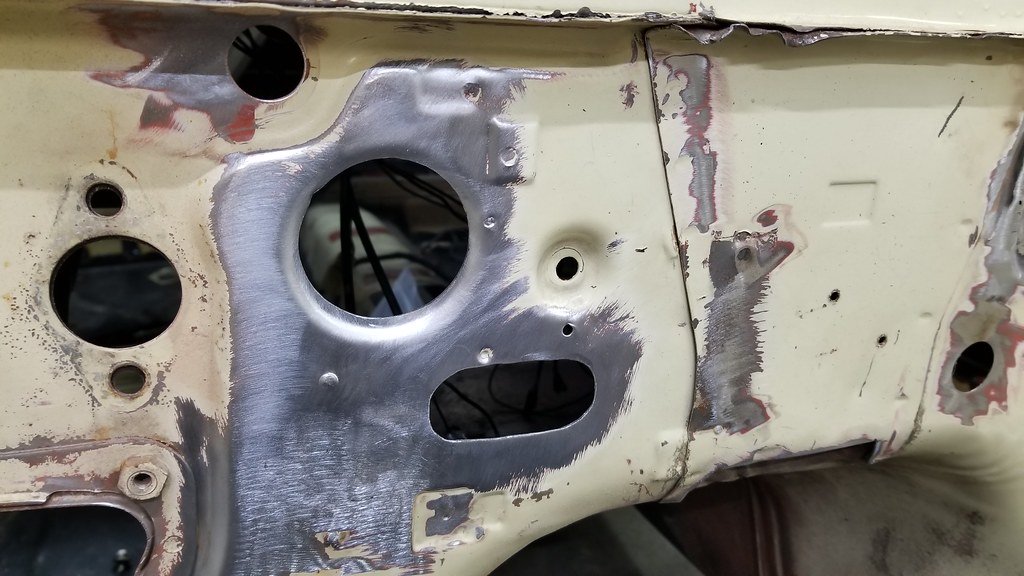
Still a lot more holes, hammer and dolly work, and other stuff to sort out, but it is getting closer-- hope to have this to the painter at the weekend so he can do his magic in the engine compartment, and then we can have some fun reassembling this to make it finally run!
Michael
Work continues on the Bluebird in between work commitments and customer projects. Over the summer, we had a great BBQ at Spriso HQ and I bolted on some sheet metal to remind me what this thing actually looks like and drug it out of the shop for some Oregon sunshine:
It does not look that good in person, but it was inspiring to see it out again. At the end of the day, it was time to push it back into the shop...
Then it was time to finish the fabrication work-- Eric Straw came down and he and I knocked out the 3" mandrel bent, stainless steel exhaust:
We used some of the custom made stainless steel exhaust hangers that we had made for our SR20DE/T powered Datsun Roadster projects:
I'll update this thread with more images from the exhaust build....
Then it was time to finish a few last details on the mechanical side before doing some paint work in the engine compartment. The area under the intercooler was still open, and needed to be finished off so the air is forced thru the intercooler into the radiator:
And with the valance back on the car:
A simple bracket was made to support the air cleaner assembly:
Then everything was pulled back out of the car to deal with the engine compartment body work:
The last few nights I have been welding up the million holes, etc that all need to be dealt with before the engine compartment is repainted. This fender nut had been stripped and I have been staring at it for years-- and tonight it was dealt with...
And finally, the heater hose outlet (to suit a SR20DET) and the new EFI wiring harness holes:
Still a lot more holes, hammer and dolly work, and other stuff to sort out, but it is getting closer-- hope to have this to the painter at the weekend so he can do his magic in the engine compartment, and then we can have some fun reassembling this to make it finally run!
Michael
Michael Spreadbury
Spriso Motorsports
www.spriso.com
Spriso Motorsports
www.spriso.com
-
two_68_510s

- Supporter
- Posts: 3894
- Joined: 18 Apr 2010 11:20
- Location: Ben Lomond California
Re: Spriso's SR20DET Bluebird Coupe Project
Nice brackets. I love brackets, and isolators! My idea of love has changed through the years, 
Joel
2 '68 510 2 door sedans
'95 240SX
“We will either find a way, or make one.” – Hannibal
2 '68 510 2 door sedans
'95 240SX
“We will either find a way, or make one.” – Hannibal

Re: Spriso's SR20DET Bluebird Coupe Project
Hey Michael.
Fantastic workmanship as always. I’m anxiously awaiting an update on the exhaust!
The heater hose routing looks top notch. Is that a Z32 grommet that you used there?
How big of an intercooler core do you have tucked in there?
Thanks for updating one of my favorite threads.
Fantastic workmanship as always. I’m anxiously awaiting an update on the exhaust!
The heater hose routing looks top notch. Is that a Z32 grommet that you used there?
How big of an intercooler core do you have tucked in there?
Thanks for updating one of my favorite threads.
'72 2 door KA project | S14 Silvia RB25DET | S14 RB26DETT (sold) | '90 Audi 90Q20V (sold)
Re: Spriso's SR20DET Bluebird Coupe Project
Body Dolly
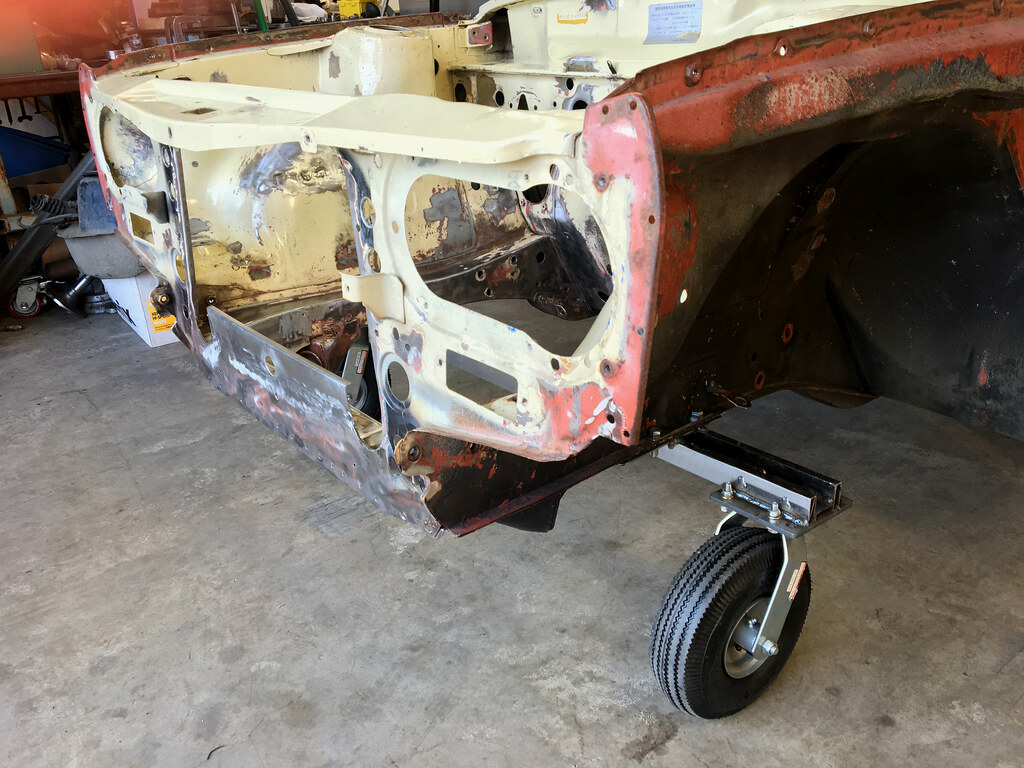
I'm going to have the engine compartment painted, but wanted a way to roll the car easily onto (and off of) the trailer, as well as make it easy to maneuver around the shop-- so I made a simple dolly using some Harbor Freight casters and some scrap steel. It mounts to the front crossmember mounts, as well as the 2 bolts for the front sway bar. Nice and simple and it works great:
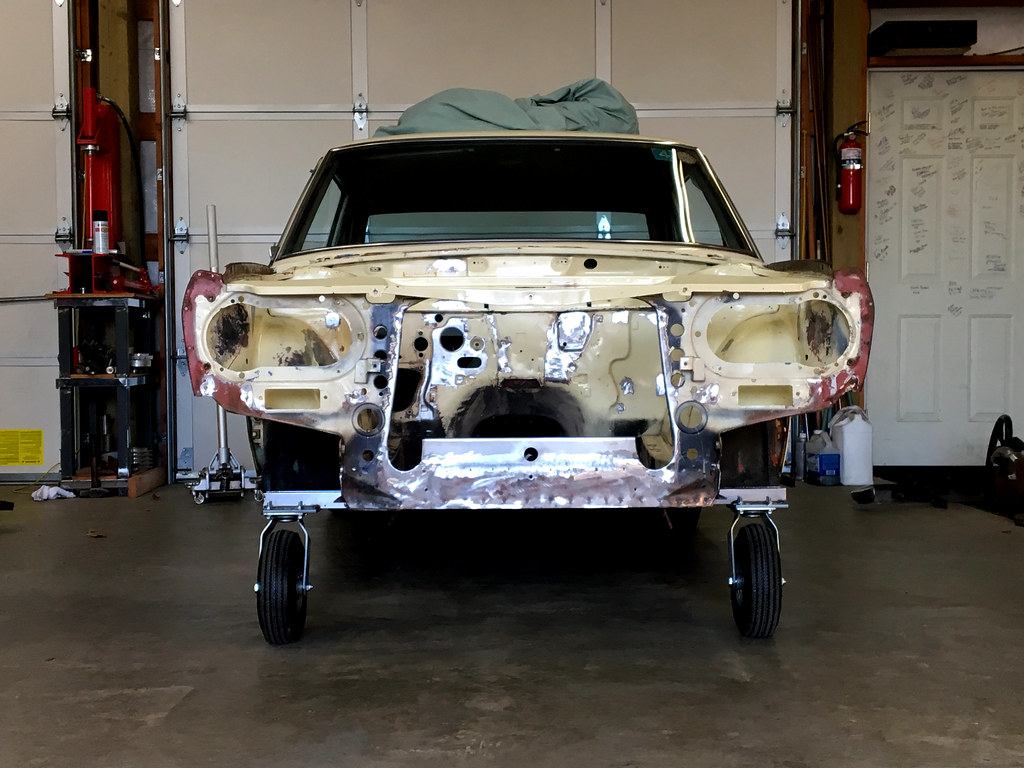
Now I just need to wait until my painter can tackle it...
Michael
I'm going to have the engine compartment painted, but wanted a way to roll the car easily onto (and off of) the trailer, as well as make it easy to maneuver around the shop-- so I made a simple dolly using some Harbor Freight casters and some scrap steel. It mounts to the front crossmember mounts, as well as the 2 bolts for the front sway bar. Nice and simple and it works great:
Now I just need to wait until my painter can tackle it...
Michael
Michael Spreadbury
Spriso Motorsports
www.spriso.com
Spriso Motorsports
www.spriso.com
Re: Spriso's SR20DET Bluebird Coupe Project
Jordan wrote:
The heater hose grommet is from a Toyota-- I just pulled a bunch of them from the U-Pull-It last time I was there...
Michael
The intercooler is a HKS core with custom end tanks-- it was built by Mario at TSR a long time ago, and last time we talked he said that the core was long out of production. I will get some dimensions next time I remember.The heater hose routing looks top notch. Is that a Z32 grommet that you used there?
How big of an intercooler core do you have tucked in there?
The heater hose grommet is from a Toyota-- I just pulled a bunch of them from the U-Pull-It last time I was there...
Michael
Michael Spreadbury
Spriso Motorsports
www.spriso.com
Spriso Motorsports
www.spriso.com
Re: Spriso's SR20DET Bluebird Coupe Project
Wow this is just amazing! Your craftsmanship is just mind boggling. Beautiful
Re: Spriso's SR20DET Bluebird Coupe Project
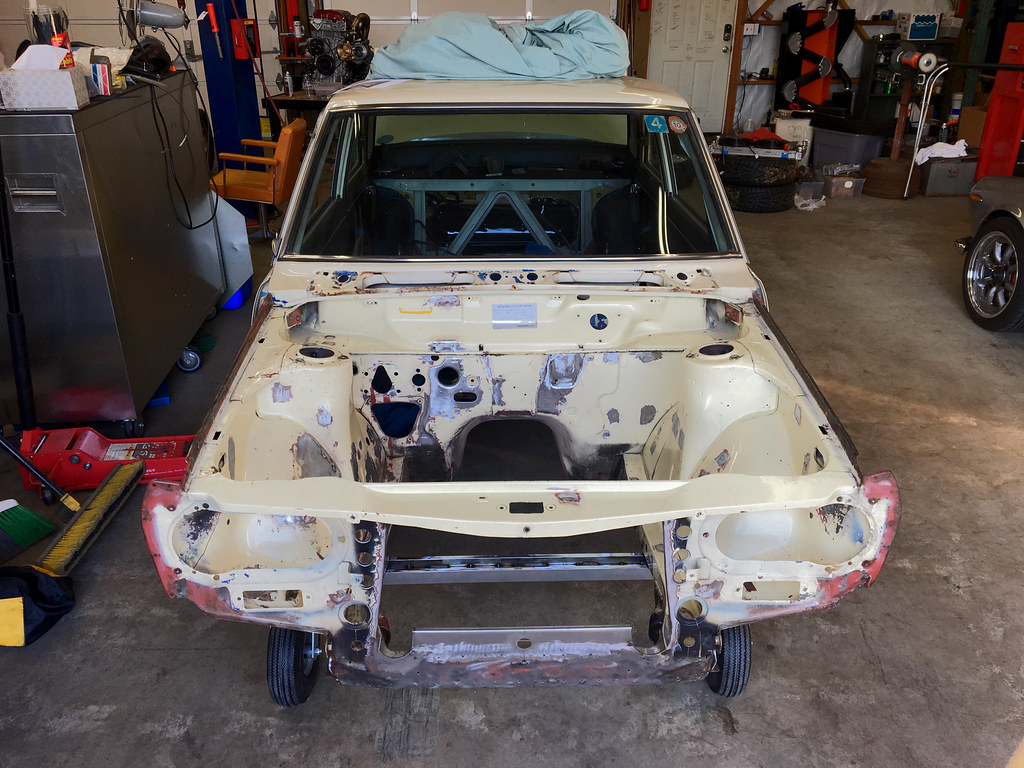
And down the rabbit hole we go...
I was all set to just paint the engine compartment, put the car back together and drive it, warts and all. But that nagging little devil on my shoulder kept saying that I would never tear the car back apart to fix it right if I did that-- and then Eric Straw said the exact same thing, and next thing you know, I have another exploded car all over my shop...

There is rust, there always is. I knew about the rocker panels, and the rust at the trunk drop on the quarter panel, but I was interested in seeing just how bad the bondo work was on the driver's quarter panel... a little time with the heat gun, shows the extent of the dent that was just buried in bondo:
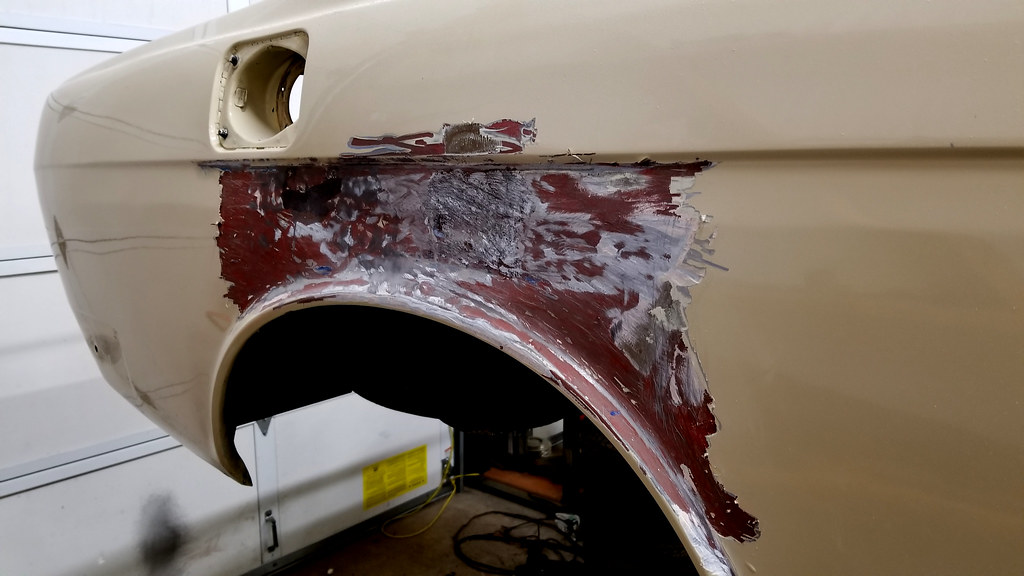
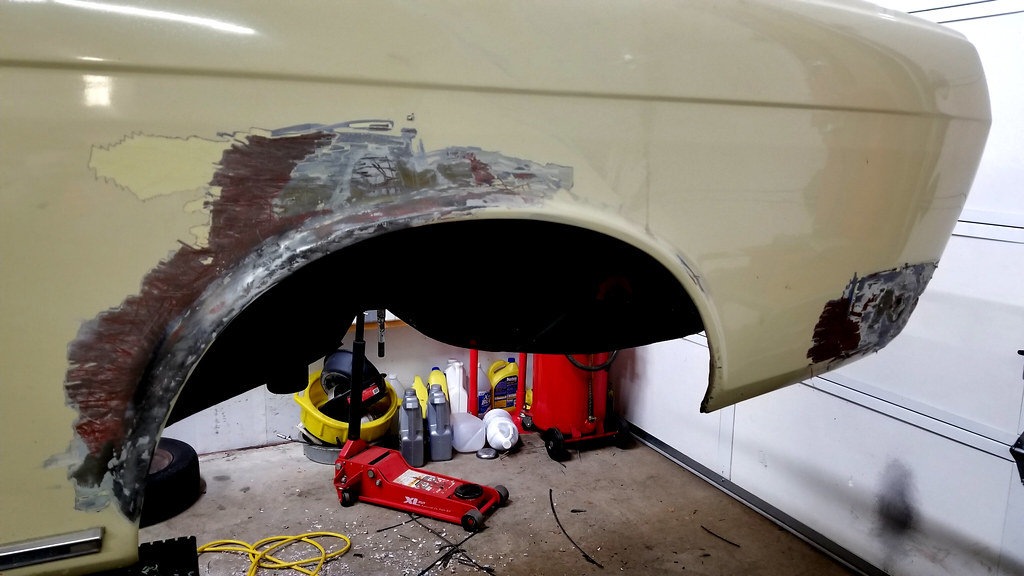
The passenger side of the car also had some body work on the wheel opening as well, which is a shame, but it will get fixed too:
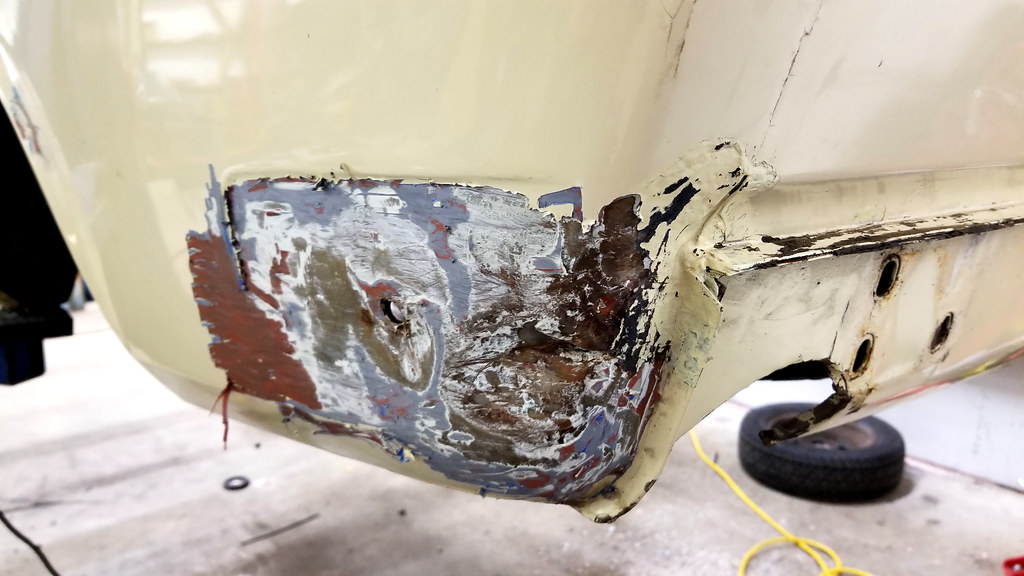
The left rear corner has actually been pierced-- no attempt to fix it, just cover it in bondo and away you go.
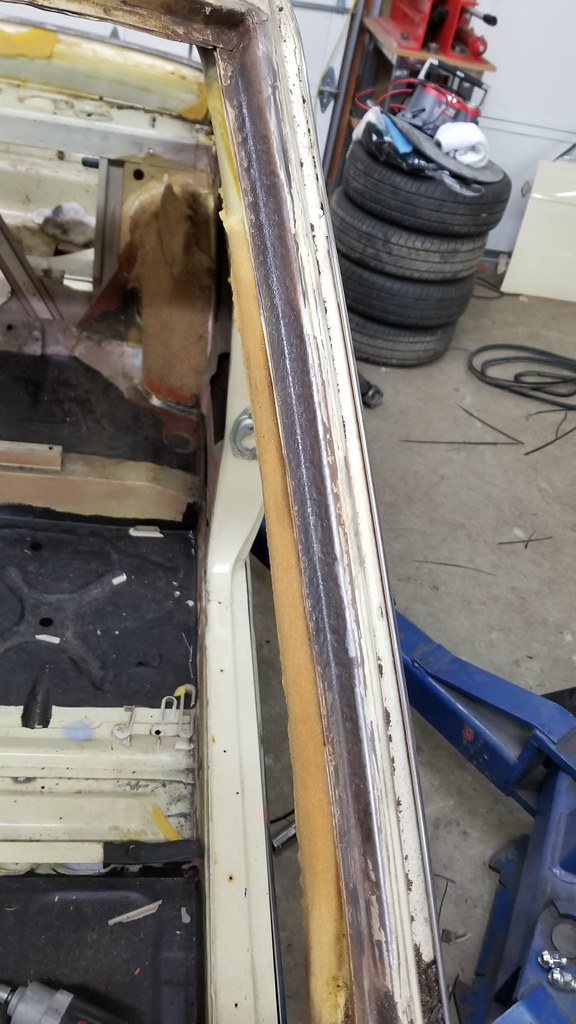
The rear window opening has some rust as well that will need to get dealt with:
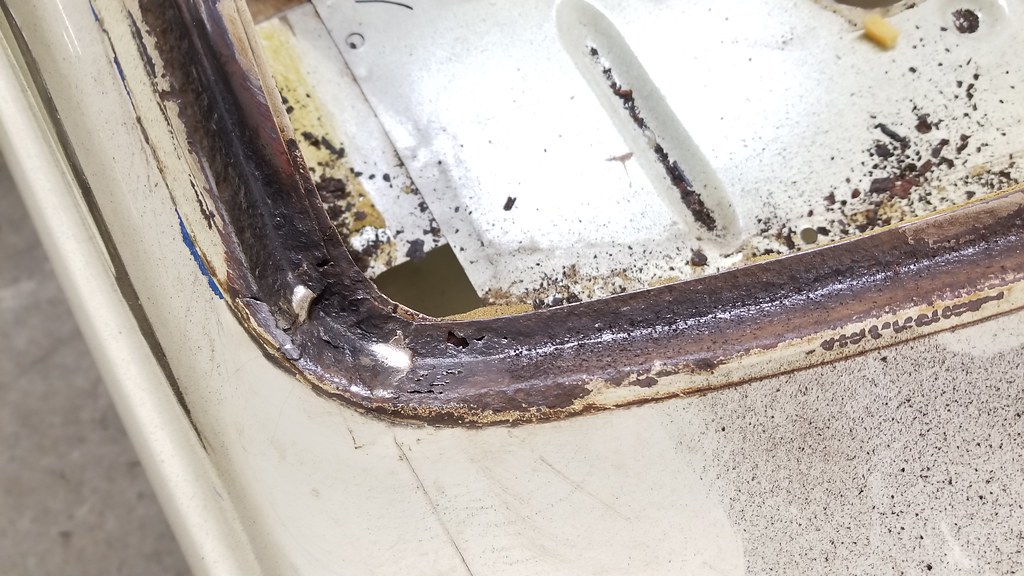
And the front A-pillar does as well:
So, all normal stuff that you would expect to find on a car imported from Japan. Floors are good, trunk is good (other than the pinch weld on the tail light panel), but overall, not too bad (yet!) It will all get dealt with and I will share it all as we rebuild this beauty again...
Michael
I was all set to just paint the engine compartment, put the car back together and drive it, warts and all. But that nagging little devil on my shoulder kept saying that I would never tear the car back apart to fix it right if I did that-- and then Eric Straw said the exact same thing, and next thing you know, I have another exploded car all over my shop...
There is rust, there always is. I knew about the rocker panels, and the rust at the trunk drop on the quarter panel, but I was interested in seeing just how bad the bondo work was on the driver's quarter panel... a little time with the heat gun, shows the extent of the dent that was just buried in bondo:
The passenger side of the car also had some body work on the wheel opening as well, which is a shame, but it will get fixed too:
The left rear corner has actually been pierced-- no attempt to fix it, just cover it in bondo and away you go.
The rear window opening has some rust as well that will need to get dealt with:
And the front A-pillar does as well:
So, all normal stuff that you would expect to find on a car imported from Japan. Floors are good, trunk is good (other than the pinch weld on the tail light panel), but overall, not too bad (yet!) It will all get dealt with and I will share it all as we rebuild this beauty again...
Michael
Michael Spreadbury
Spriso Motorsports
www.spriso.com
Spriso Motorsports
www.spriso.com
Re: Spriso's SR20DET Bluebird Coupe Project
You’re totally doing the right thing - you’ll spend way less time doing it all once!
Thanks for taking the time and keeping us updated on this project Michael. Always a joy to read your posts.
Byron
Thanks for taking the time and keeping us updated on this project Michael. Always a joy to read your posts.
Byron
Love people and use things,
because the opposite never works.
because the opposite never works.
Re: Spriso's SR20DET Bluebird Coupe Project
This is so motivating to see! I have been pushing my projects back for so long, I'm about to change all that. I want a Datsun to drive again. Thanks for posting!!
Re: Spriso's SR20DET Bluebird Coupe Project
Where the Rust Hides
I spent this afternoon working on the car, exposing the problem areas that I knew I would have to deal with. The rocker panels had a lot of evidence of rust from the outside, and since this car is going to be acid dipped in a few weeks, I decided to open up all the problem areas that so we can deal with them.
The passenger side rocker panel was in the worst shape. It had a huge dent in the center, and rust holes on the leading edge, and the rear, so I knew the whole thing would need to be replaced-- thankfully I have a pair of NOS panels for this section.
A closer view showed how much debris and rust was on the inside:
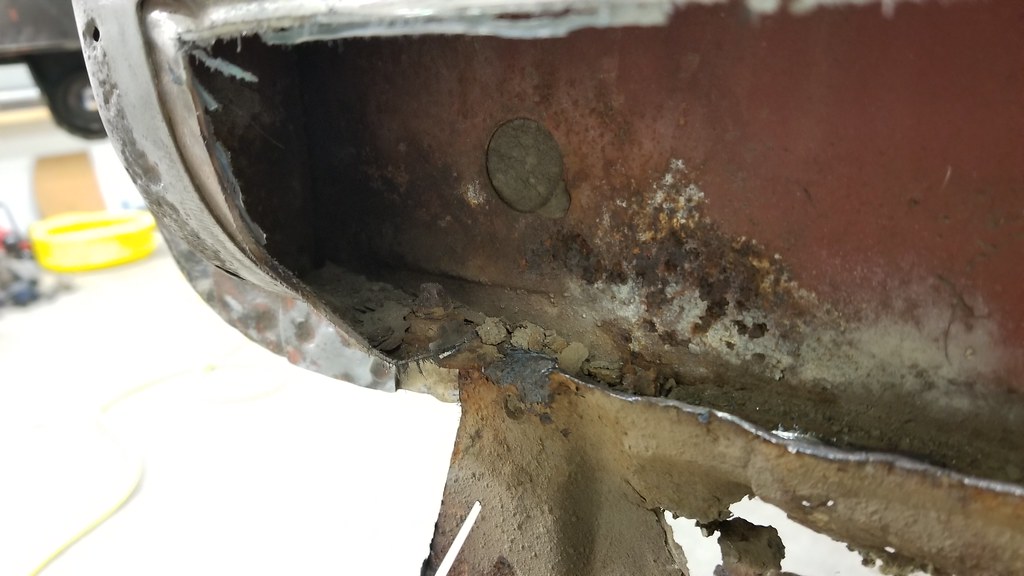
And towards the rear-- more rust and dirt:
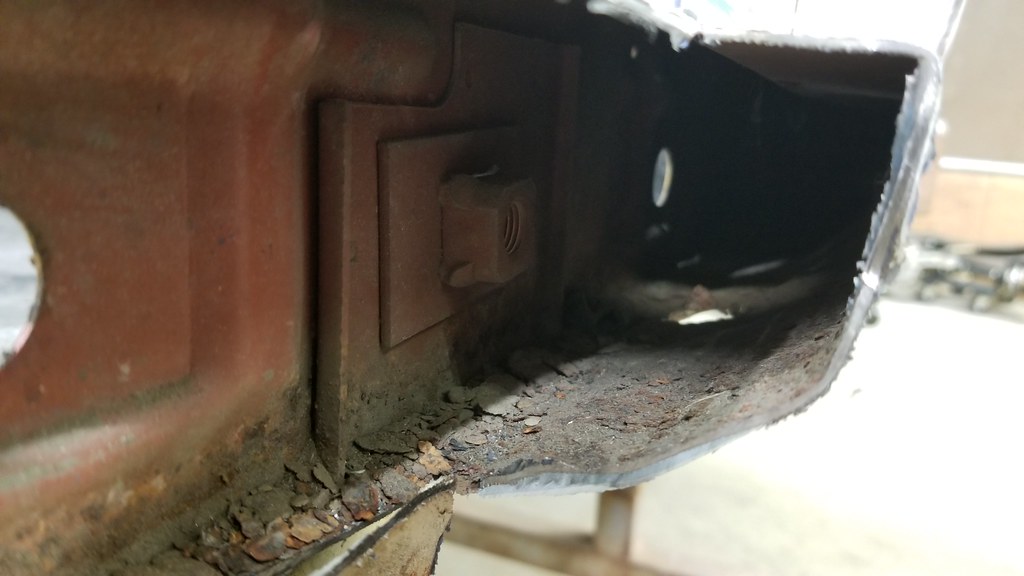
The outer skins where the quarter panel overlap the rocker panel were also carefully cut away to expose the rust (this is the right side rocker panel):
It gets quite heavy towards the rear of the rocker:
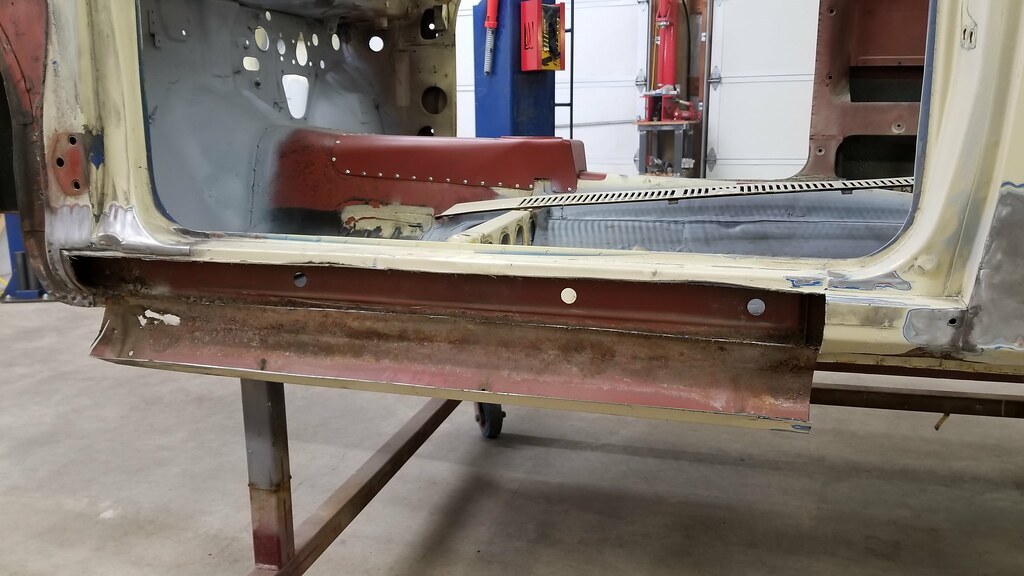
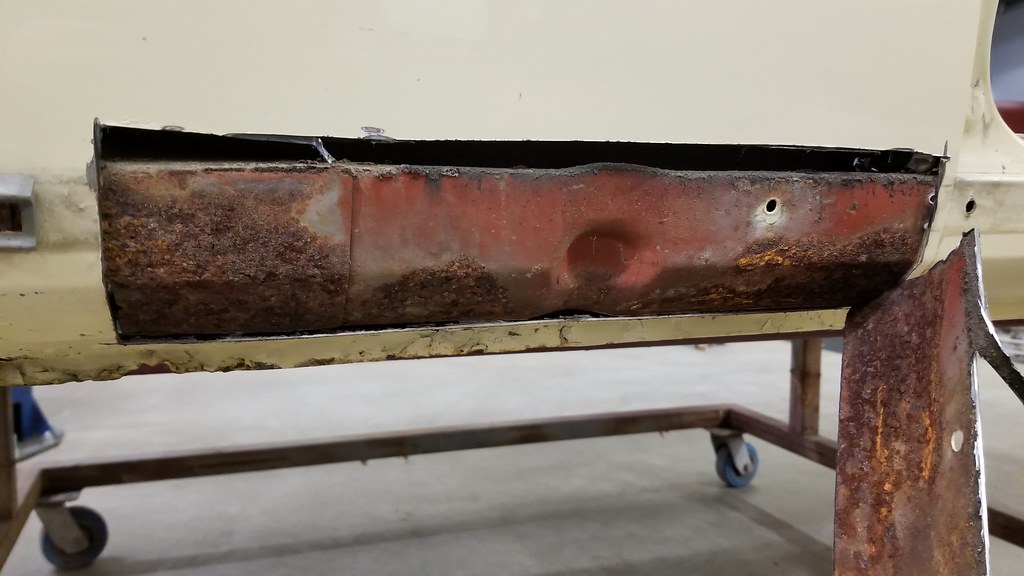
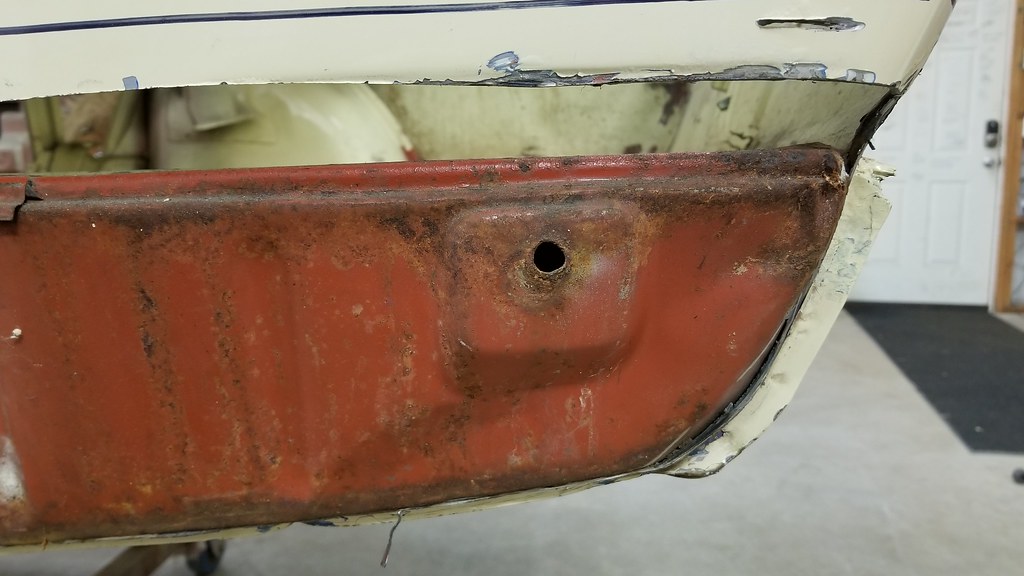
The left side quarter panel also had an area that would need to be removed to deal with some trunk rust. I have a patch panel for this area already, so I cut the outer skin off to see what I had-- from the outside, not too bad:
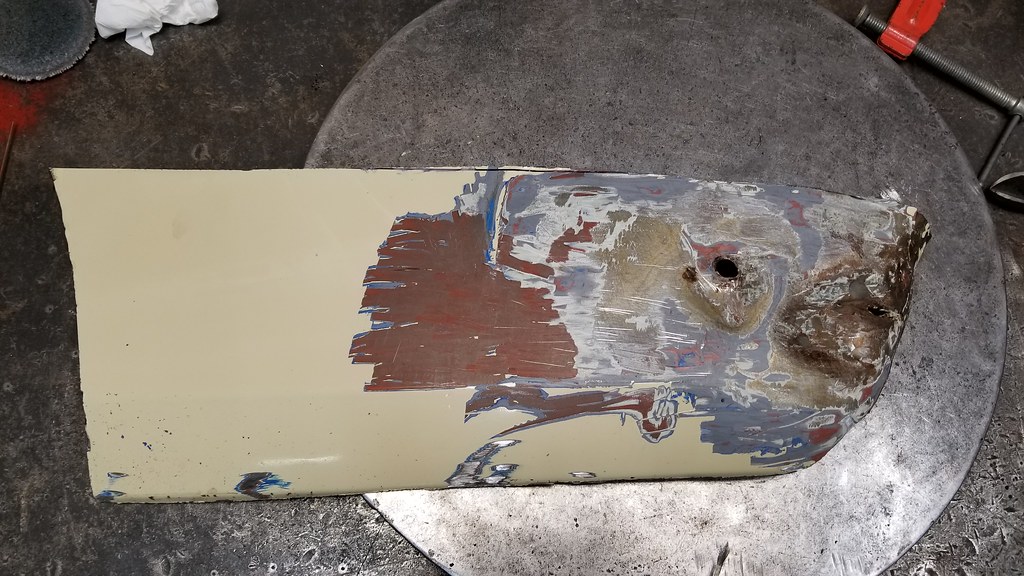
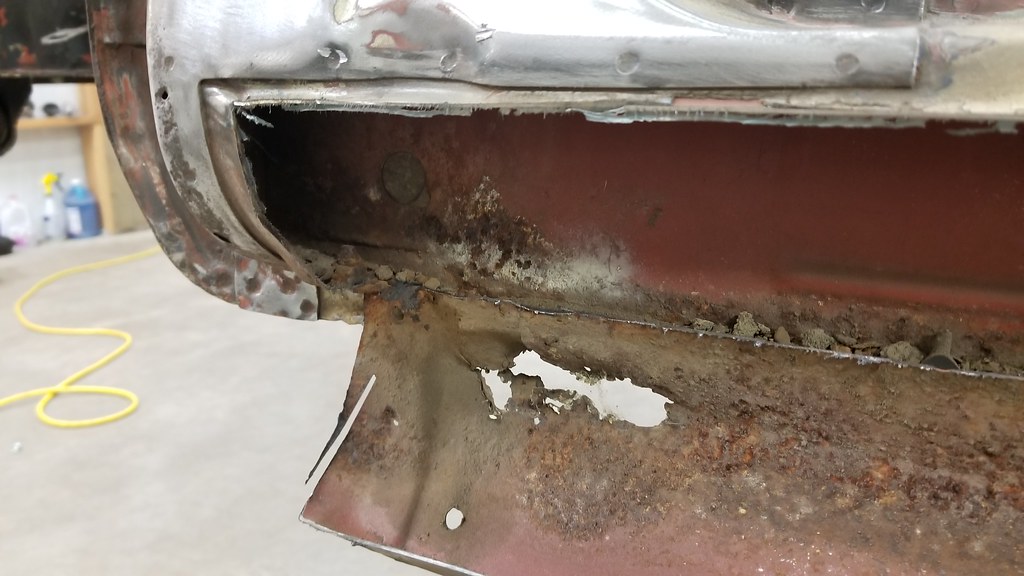
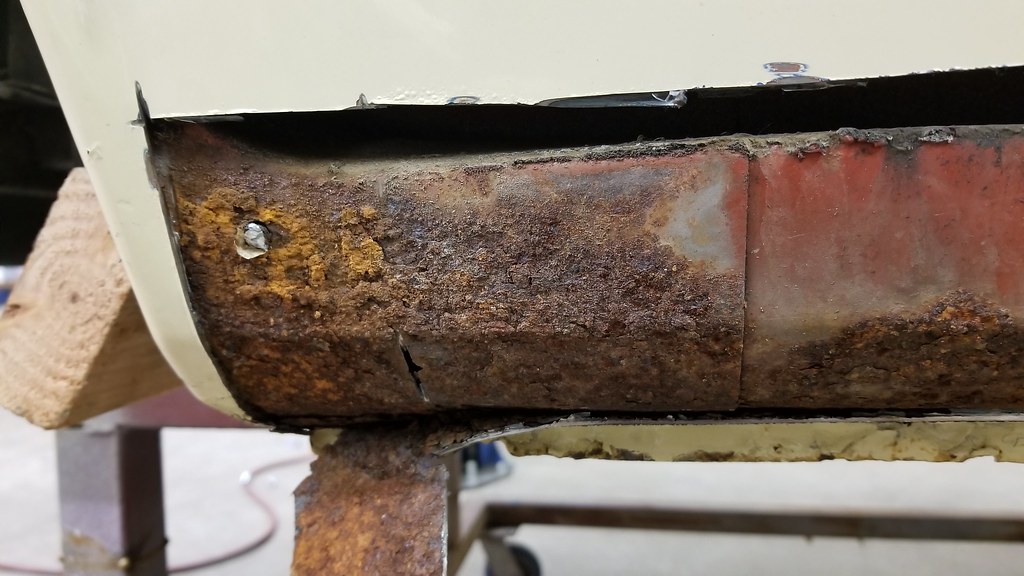
But flipping it over, you can see how deep the rust was where the trunk floor met the outside skin:
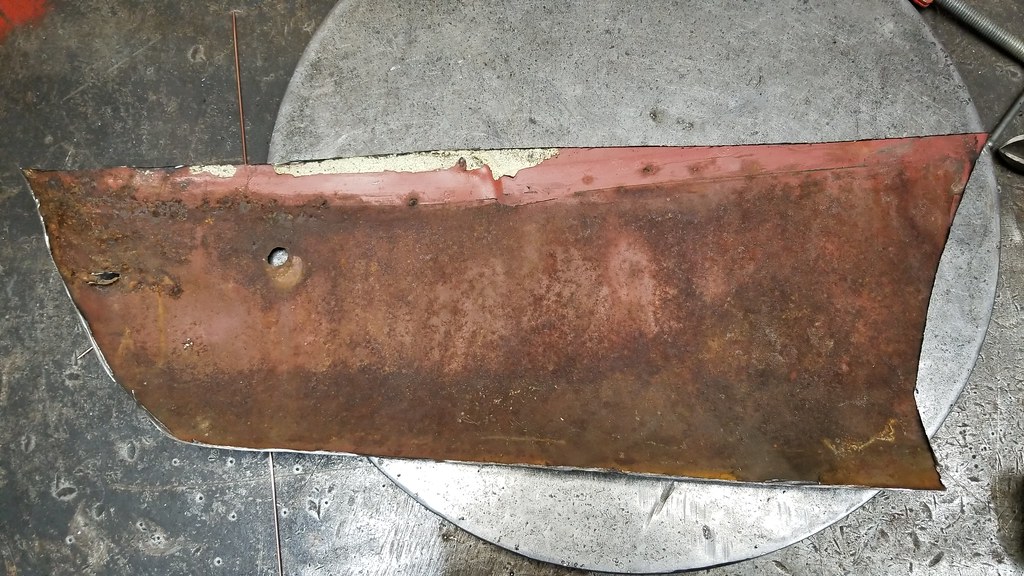
I fully expected that the trunk drops would be fully rusted out, but was quite surprised to see that they look like they can be reused:
Still a little more stripping of the body to do, but its getting closer for it's bird bath!
Michael
I spent this afternoon working on the car, exposing the problem areas that I knew I would have to deal with. The rocker panels had a lot of evidence of rust from the outside, and since this car is going to be acid dipped in a few weeks, I decided to open up all the problem areas that so we can deal with them.
The passenger side rocker panel was in the worst shape. It had a huge dent in the center, and rust holes on the leading edge, and the rear, so I knew the whole thing would need to be replaced-- thankfully I have a pair of NOS panels for this section.
A closer view showed how much debris and rust was on the inside:
And towards the rear-- more rust and dirt:
The outer skins where the quarter panel overlap the rocker panel were also carefully cut away to expose the rust (this is the right side rocker panel):
It gets quite heavy towards the rear of the rocker:
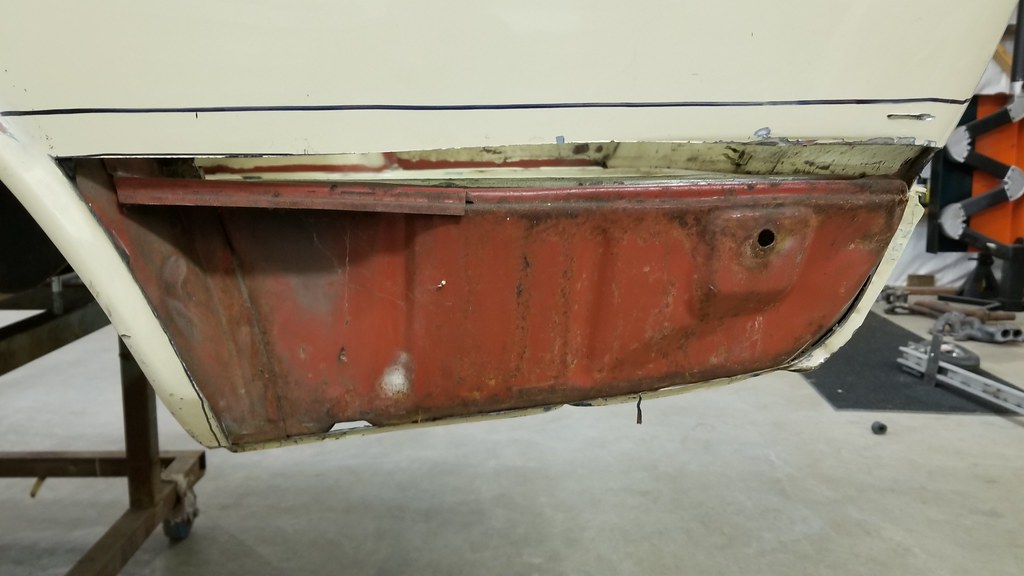
The left side quarter panel also had an area that would need to be removed to deal with some trunk rust. I have a patch panel for this area already, so I cut the outer skin off to see what I had-- from the outside, not too bad:
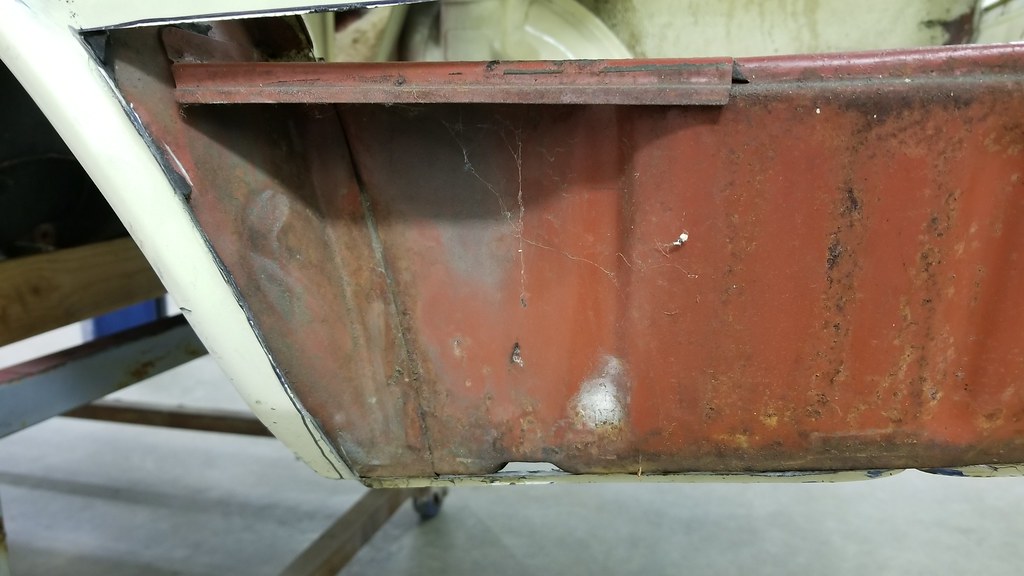
But flipping it over, you can see how deep the rust was where the trunk floor met the outside skin:
I fully expected that the trunk drops would be fully rusted out, but was quite surprised to see that they look like they can be reused:
Still a little more stripping of the body to do, but its getting closer for it's bird bath!
Michael
Michael Spreadbury
Spriso Motorsports
www.spriso.com
Spriso Motorsports
www.spriso.com